
Administration Console: Configuration
The Configuration tab displays the properties that control your i2 Explore for iBase deployment. You can view, edit, and validate these properties before deploying or upgrading.
Any changes that you save here are applied the next time you run a deployment.
For a detailed reference of every individual property, see Configuration Properties.
When you can edit and save
You can edit configuration properties at any time, but you can only save changes while all services are stopped.
If you attempt to save while any service is running, the save is blocked and an error message is displayed. Stop all services from the Services tab before saving your changes.
After you save your changes, they do not take effect immediately. You must run a deployment from the Deployment tab to apply the updated configuration.
Saving and resetting
Click Save Valid Changes to save all properties that pass validation. If some properties have validation errors, they are skipped and the Administration Console displays a message indicating how many invalid properties were not saved.
Click Reset to discard all unsaved changes and revert every property to its last saved value.
Property groups
Properties are organised into groups. Most groups display their properties as editable text fields or drop-down lists. Two groups have additional functionality:
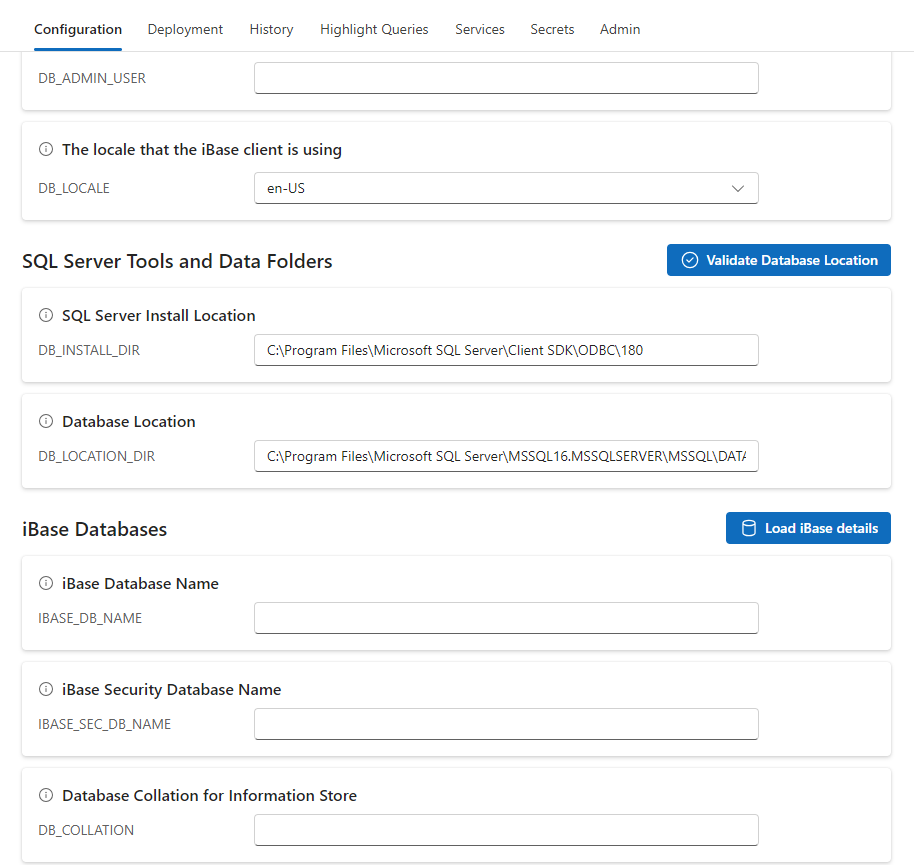
SQL Server tools and data folders
This group contains properties such as DB_INSTALL_DIR and DB_LOCATION_DIR. It includes a Validate Database Location button that checks whether the configured database location path is valid and writable. For more information, see Validating the database location.
iBase databases
This group contains properties such as IBASE_DB_NАME, IBASE_SEC_DB_NАME, and DB_COLLATION. It includes a Load iBase details button that discovers the iBase databases available on your SQL Server instance and auto-populates several fields. For more information, see Loading iBase details.
The remaining groups, such as those for authentication settings, display their properties as standard text fields or drop-down lists.
Loading iBase details
The Load iBase details button is in the header of the iBase Databases group. It connects to your SQL Server instance to discover available iBase databases and automatically populate related configuration fields.
How it works
Click Load iBase details. A credentials dialog is displayed.
Enter the database administrator username and password, then click OK.
Note: The username is pre-populated from the DB_ADMIN_USER property. For complete results, use an account with global visibility or sysadmin privileges.
The Administration Console queries the SQL Server instance and retrieves the available data databases, security databases, collations, database file locations, and Search 360 status for each database.
After the discovery completes, the following fields are automatically updated:
iBase Database Name (IBASE_DB_NАME) — If the field is blank, the first discovered data database is selected. If the field already contains a value, it is left unchanged.
iBase Security Database Name (IBASE_SEC_DB_NАME) — If the field is blank, the first discovered security database is selected. If the field already contains a value, it is left unchanged.
Database Collation for Information Store (DB_COLLATION) — Automatically set to match the collation of the selected data database.
Database Location (DB_LOCATION_DIR) — Automatically set to match the file location of the selected data database.
After discovery, the database name fields become drop-down lists populated with the discovered databases. If you select a different data database from the iBase Database Name list, DB_COLLATION and DB_LOCATION_DIR are automatically updated to match the newly selected database.
Visual indicators after discovery
A green tick appears next to a database name field if the current value matches a discovered database.
A yellow warning icon appears if the current value is not found in the discovered list, or if the selected data database does not have Search 360 enabled, because the deployment cannot succeed without it.
Validating the database location
The Validate Database Location button is in the header of the SQL Server Tools and Data Folders group. It verifies that the path specified in DB_LOCATION_DIR is accessible and writable by the SQL Server instance.
How it works
Click Validate Database Location. A credentials dialog is displayed.
Enter the database administrator username and password, then click OK.
The Administration Console connects to SQL Server using the provided credentials and checks that the path in DB_LOCATION_DIR is valid and writable.
If validation succeeds, a green tick appears next to the Database Location field with the tooltip "Database location is writable".
If validation fails, a warning icon appears and an error dialog describes the problem.
Note: Whenever you change the value of DB_LOCATION_DIR, the validation status is reset. You can validate again to confirm that the new path is writable.
Enabling Entra ID and Active Directory authentication
The authentication mode is controlled by the IBASE_AUTH_MODE property. By default, it is set to IBASE_SECURITY, which uses native iBase authentication.
When you change IBASE_AUTH_MODE to ENTRA_ID, the Entra ID configuration fields are enabled. When you change IBASE_AUTH_MODE to ACTIVE_DIRECTORY, the Active Directory and LDAP configuration fields are enabled. For a full list of the properties in each mode, see Configuration properties.
Fields that do not apply to the selected authentication mode are disabled and displayed at reduced opacity with a "Disabled" badge. When you switch authentication mode, any unsaved edits in fields that become disabled are discarded, and newly enabled fields are validated immediately.
Validation
The Administration Console validates every property when the Configuration tab is first loaded. As you edit a property, its value is validated after a short delay. If a property fails validation, the following indicators appear:
A red error message is displayed beneath the field.
A red "Invalid" badge appears next to the field.
A red error icon appears on the Configuration tab label to indicate that the page contains validation errors.
A red message bar appears at the top of the tab: "There are validation errors in the configuration below."
Changing one property can trigger re-validation of related properties. For example, changing IBASE_AUTH_MODE causes the newly enabled authentication fields to be validated.
Properties with validation errors do not prevent you from saving. When you click Save Valid Changes, all properties that pass validation are saved and any invalid properties are skipped. This means you can fill in your configuration incrementally, saving valid properties as you go and returning to fix invalid ones later.