
Configuring Active Directory for Explore for iBase
To use Active Directory single sign-on with i2 Explore for iBase, you need to configure Active Directory before starting the installation process.
Active Directory single sign-on uses the Kerberos authentication protocol. Users and groups are accessed from Active Directory using the LDAP protocol.
Before you begin
All the steps in this document use a domain of exampledomain.com. You need to replace this with your own domain name where appropriate.
Some assumptions are made about your environment when configuring Active Directory for i2 Explore for iBase:
There is already an Active Directory Controller configured as a Domain Controller containing users and groups.
Explore for iBase will be installed on a Windows server that is a member of the same domain as the Active Directory Controller.
The users that will use Explore for iBase exist in the Active Directory Controller and have access to a client Windows machine on the same domain.
iBase Designer can browse and add Active Directory users from this domain using the iBase Security Manager.
You can link to the configuring Active Directory video directly here.
Adding a user to bind to the LDAP service
When installing Explore for iBase a user and password are required for binding to the LDAP server.
The installer will ask for the following:
Distinguished name (DN) of the user for binding to the directory service
Password of the user for binding to the directory service.
To create a user for this purpose, follow these steps:
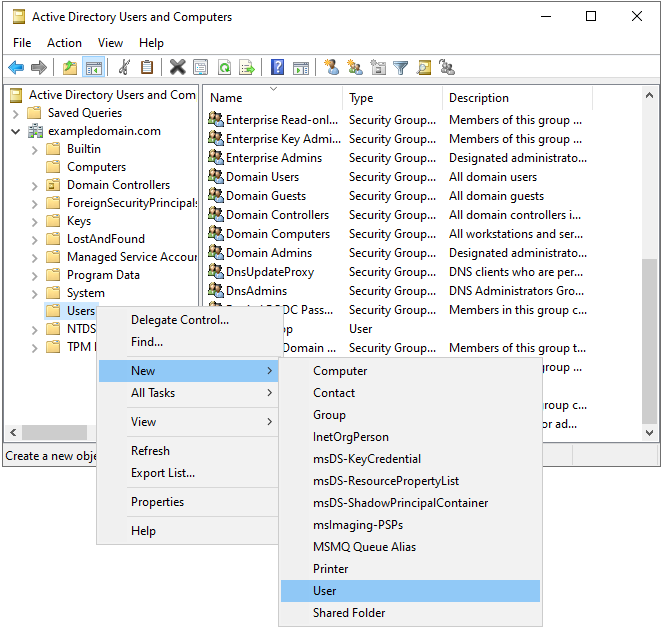
As the domain Administrator, open the Active Directory Users and Computers management console on the Active Directory Controller.
In the left-hand pane, navigate to the appropriate Organizational Unit (OU) where you want to create the user.
For the example we use the Users OU under the domain exampledomain.com.
Right-click the OU, select New > User.
Fill in the required fields (First name, Last name, User logon)
Here we use LDAP READER as our example LDAP user. You can choose a different name, but make a note of it as you will need it later.
Set LDAP as the First name.
Set READER as the Last name.
Set ldap.reader as the User logon name.

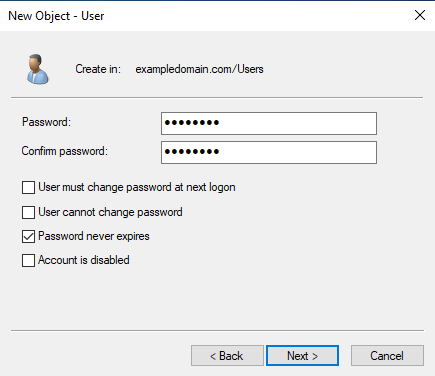
Set a password for the user, and ensure that User must change password at next logon is unchecked. You should also check Password never expires.
Click Next, then Finish to create the user.
The Distinguished name (DN) of the user can be found by right-clicking the user in the Active Directory Users and Computers management console, selecting Properties, and then navigating to the Attribute Editor tab. Look for the distinguishedName attribute. Our example user has the following DN:
CN=LDAP READER,CN=Users,DC=exampledomain,DC=comAdding the Liberty service user to Active Directory
Kerberos authentication requires a service user to be created in Active Directory for the Liberty server to use when authenticating users.
To create a service user for this purpose, follow these steps:
As the domain Administrator, Open the Active Directory Users and Computers management console on the Active Directory Controller.
In the left-hand pane, navigate to the appropriate Organizational Unit (OU) where you want to create the user.
For the example we use the Users OU under the domain exampledomain.com.
Right-click the OU, select New > User.
Fill in the required fields (First name, Last name, User logon)
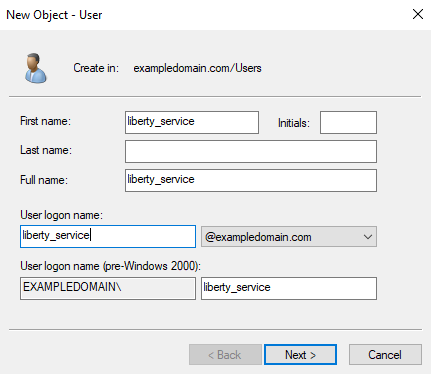
Here we use liberty_service as our example user. You can choose a different name, but make a note of it as you will need it later.
Set liberty_service as the First name.
Leave the Last name blank.
Set liberty_service as the User logon name.
Set a password for the user, and ensure that User must change password at next logon is unchecked. You should also check Password never expires.
Click Next, then Finish to create the user.
Add the Service Principal Name (SPN) for the Liberty service user
To enable Kerberos authentication, you need to add a Service Principal Name (SPN) for the Liberty service user created in the previous section.
To add the SPN, follow these steps:
Open a Command Prompt as Administrator on the Active Directory Controller.
Run the following command to add the SPN, replacing <LIBERTY_SERVICE_USER> with the user name of the Liberty service user created in the previous section, and <I2ANALYZE_SERVICE_FQDN> with the fully qualified domain name (FQDN) of the server where Explore for iBase will be installed:
setspn -S HTTP/<I2ANALYZE_SERVICE_FQDN> <LIBERTY_SERVICE_USER>For example:
setspn -S HTTP/i2explore.exampledomain.com liberty_serviceThe output from this commmand will look similar to the following:
Registering ServicePrincipalNames for CN=liberty_service,CN=Users,DC=exampledomain,DC=com
       HTTP/i2explore.exampledomain.com
Updated object
Running the Microsoft setspn command above, maps the user account to a Kerberos SPN. This user account represents the Open Liberty server as a Kerberos service with the Kerberos Key Distribution Center (KDC).
Verify that there are no duplicate SPNs
To verify that the same SPN is not registered to multiple users, follow these steps:
Open a Command Prompt as Administrator on the Active Directory Controller.
Run the following command to list all users that are mapped to the SPN HTTP/<I2ANALYZE_SERVICE_FQDN>, replacing <I2ANALYZE_SERVICE_FQDN> with the fully qualified domain name (FQDN) of the server where Explore for iBase will be installed.
ldifde -f check_SPN.txt -t 3268 -d "" -l servicePrincipalName -r "(servicePrincipalName=HTTP/<I2ANALYZE_SERVICE_FQDN>)" -p subtreeFor example:
ldifde -f check_SPN.txt -t 3268 -d "" -l servicePrincipalName -r "(servicePrincipalName=HTTP/i2explore.exampledomain.com)" -p subtreeThe output should look similar to the following, which shows only one entry:
dn: CN=liberty_service,CN=Users,DC=exampledomain,DC=com
changetype: add
servicePrincipalName: HTTP/i2explore.exampledomain.com
If there are multiple entries, you need to remove the duplicate SPNs using the setspn -D command. For example, to remove the SPN from another user, run the following command:
setspn -D HTTP/<I2ANALYZE_SERVICE_FQDN> <OTHER_USER>Configure the Liberty service user to delegate credentials
To enable Kerberos authentication, you need to configure the Liberty service user created in the previous section to delegate credentials.
As the domain Administrator, Open the Active Directory Users and Computers management console on the Active Directory Controller.
In the left-hand pane, navigate to the appropriate Organizational Unit (OU) where you created the Liberty service user.
For the example we use the Users OU under the domain exampledomain.com.
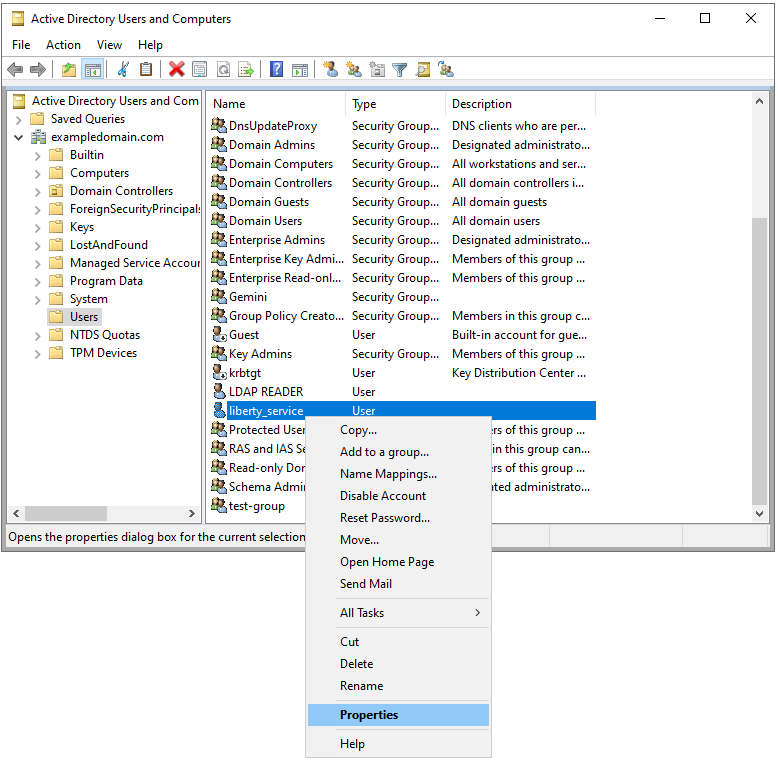
Right-click the Liberty service user, select Properties.
Navigate to the Delegation tab.
Select Trust this user for delegation to any service (Kerberos only).

Click OK to save the changes.
Create a Kerberos Keytab file for the Liberty service user
When installing Explore for iBase, a Kerberos service principal name (SPN) is required.
The installer will ask for the following:
Kerberos service principal name (SPN)
The value for this is in the following format: HTTP/<I2ANALYZE_SERVICE_FQDN>@<KERBEROS_REALM>
<I2ANALYZE_SERVICE_FQDN> is the fully qualified domain name (FQDN) of the server where Explore for iBase will be installed
<KERBEROS_REALM> is your Kerberos realm (usually your domain name in uppercase)
To enable Kerberos authentication, you need to create a Keytab file for the Liberty service user created in the previous section.
To create the Keytab file, follow these steps:
Open a Command Prompt as Administrator on the Active Directory Controller.
Run the following command to create the Keytab file, replacing:
<KEYTAB_FILE_PATH> with the full path where you want to save the Keytab file
<I2ANALYZE_SERVICE_FQDN> with the fully qualified domain name (FQDN) of the server where Explore for iBase will be installed
<KERBEROS_REALM> with your Kerberos realm (usually your domain name in uppercase)
<LIBERTY_SERVICE_USER> with the user name of the Liberty service user created in the previous section
<DOMAIN_NАME> with your domain name
<LIBERTY_SERVICE_USER_PASSWORD> with the password of the Liberty service user
<KERBEROS_SPN> with the following format: HTTP/<I2ANALYZE_SERVICE_FQDN>@<KERBEROS_REALM>
ktpass -out <KEYTAB_FILE_PATH> -princ <KERBEROS_SPN> -mapuser <LIBERTY_SERVICE_USER>@<DOMAIN_NАME> -mapOp set -pass <LIBERTY_SERVICE_USER_PASSWORD> -crypto ALL -ptype KRB5_NT_PRINCIPAL
For example:
ktpass -out krb5.keytab -princ HTTP/i2explore.exampledomain.com@EXAMPLEDOMAIN.COM -mapUser liberty_service@exampledomain.com -mapOp set -pass Passw0rd -crypto ALL -ptype KRB5_NT_PRINCIPALCopy the keytab file to the Windows server where Explore for iBase will be installed.
Keep the Keytab file in a secure location, as it contains sensitive information that can be used to authenticate the Liberty service user.
Create a Kerberos config file for the Liberty service user
To enable Kerberos authentication, you need to create a Kerberos configuration file for the Liberty service user created in the previous section.
Use this template to create the krb5.conf file, replacing the placeholders with your own values:
<KERBEROS_REALM> with your Kerberos realm (usually your domain name in uppercase)
<ADC_FQDN> with the fully qualified domain name (FQDN) of the Active Directory Controller
<DOMAIN_NАME> with your domain name
The allow_weak_crypto = true line is included to support older encryption types like rc4-hmac that might be used in some Active Directory environments. It is suggested that you only use strong encryption types.
[libdefaults]
    default_realm = <KERBEROS_REALM>
    default_tkt_enctypes = rc4-hmac aes256-cts-hmac-sha1-96 aes128-cts-hmac-sha1-96
    default_tgs_enctypes = rc4-hmac aes256-cts-hmac-sha1-96 aes128-cts-hmac-sha1-96
    allow_weak_crypto = true
[realms]
    <KERBEROS_REALM> = {
        kdc = <ADC_FQDN>:88
        default_domain = <DOMAIN_NАME>
}
[domain_realm]
    .<DOMAIN_NАME> = <KERBEROS_REALM>
For example:
[libdefaults]
    default_realm = EXAMPLEDOMAIN.COM
    default_tkt_enctypes = rc4-hmac aes256-cts-hmac-sha1-96 aes128-cts-hmac-sha1-96
    default_tgs_enctypes = rc4-hmac aes256-cts-hmac-sha1-96 aes128-cts-hmac-sha1-96
    allow_weak_crypto = true
[realms]
    EXAMPLEDOMAIN.COM = {
        kdc = adc.exampledomain.com:88
        default_domain = exampledomain.com
}
[domain_realm]
    .exampledomain.com = EXAMPLEDOMAIN.COM
Copy the config file to the Windows server where Explore for iBase will be installed.
After configuring Active Directory
When you have configured Active Directory, you can proceed to install Explore for iBase with Active Directory.
You can link to the installing with Active Directory video directly here.
After completing the configuration and installation steps in this document, you must now configure client browsers to use Active Directory authentication to connect to the Explore for iBase server.
Follow the steps in the document Configuring Client Browsers For Active directory authentication to do this.