
Configuring a secure connection to SQL Server
By default, connections to SQL Server are not secure, however after deployment you can configure i2 Explore for iBase to connect securely using SSL.
Configuring secure SQL Server connections
To enable secure connections to SQL Server a certificate must be created and installed on your SQL Server instance. The certificate must be signed by the provided certificate authority (CA) if provided during installation, or by the generated external CA.
The following steps require the openssl tool. This can be found in the Windows Subsystem for Linux (WSL) or by installing a Windows build of openssl.
Creating the certificate request
Firstly you need to create a sql_server_req.cnf file to define the certificate request, replacing the placeholders with your own values:
<DB_FQDN> with the fully qualified domain name of the iBase database server, the same as it appears in the DB_FQDN property in variables.conf.
For example MySqlServer
  [req]
  distinguished_name = req_distinguished_name
  req_extensions = v3_req
  prompt = no

  [req_distinguished_name]
  CN = <DB_FQDN>

  [v3_req]
  keyUsage = keyEncipherment, dataEncipherment
  extendedKeyUsage = serverAuth
  subjectAltName = @alt_names
  [alt_names]
  DNS.1 = <DB_FQDN>
  DNS.2 = localhost
Create the certificate request using the openssl command-line tool:
openssl req -new -nodes -keyout sql_server.key -out sql_server.csr -config sql_server_req.cnfThis creates both the private key file sql_server.key and the certificate request file sql_server.csr.
Signing the certificate request with a provided certificate authority (CA)
If you have provided your own CA, submit the request to your CA to obtain a signed certificate.
Submit the sql_server.csr file to your CA according to your organization's procedures and retrieve the signed certificate file which we will call sql_server.cer for the next steps.
Signing the certificate request with the generated external CA
Although this is possible it is not recommended for production environments.
Locate the generated external CA certificate and private key files:
<installation_location>/explore-for-ibase/analyze-deployment-tooling/environment-secrets/generated-secrets/certificates/externalCA/CA.cer
<installation_location>/explore-for-ibase/analyze-deployment-tooling/environment-secrets/generated-secrets/certificates/externalCA/CA.key
Use these to sign the sql_server.csr file to create the signed certificate sql_server.cer:
Run the following command to sign the certificate request:
openssl x509 -req -in sql_server.csr -CA CA.cer -CAkey CA.key -CAcreateserial -out sql_server.cer -days 365 -extensions v3_req -extfile sql_server_req.cnfYou can to adjust the -days parameter to suit your requirements.
Show the certificate
You can view the contents of the signed certificate using the following command:
openssl x509 -in sql_server.cer -text -nooutConverting to PKCS#12 format to include the private key and CA certificate
To install the certificate on SQL Server, you need to convert the signed certificate and private key into a PKCS#12 format file.
Run the following command to create the sql_server.pfx file:
openssl pkcs12 -export -out sql_server.pfx -inkey sql_server.key -in sql_server.cer -certfile CA.cerYou will be prompted to set an export password for the PKCS#12 file, make a note of this password as you will need it during the installation on SQL Server.
Installing the signed certificate on SQL Server host machine
Finally, install the signed certificate on the SQL Server instance by following these steps:
Copy the sql_server.pfx file to the SQL Server host machine.
Open Manage Computer Certificates settings by running the certlm.msc command.
Expand Personal > Certificates.
Right-click Certificates, select All Tasks > Import...
In the Certificate Import Wizard, click Next.
Browse to the location of the signed certificate file sql_server.pfx, select it, and click Next.
You may need to change the file type filter to show PKCS#12 files.
Enter the password you set when creating the PKCS#12 file, and select the option to mark the private key as exportable, then click Next.
Ensure that the certificate store is set to Personal, and click Next.
Click Finish to complete the import.
A message displays indicating that the import was successful.
Ensure that i2 Explore for iBase deployment tooling trusts the SQL Server certificate
Important: The CA certificate that signed the SQL Server certificate must also be installed in the Trusted Root Certification Authorities store on the host machine where i2 Explore for iBase is being installed.
This ensures that the i2 Explore for iBase deployment tooling trusts the SQL Server certificate when establishing a secure connection using the SQL Server client tool sqlcmd.
For information about installing the certificate on Windows, see Install Certificates with the Microsoft Management Console.
Configuring SQL Server to use the installed certificate
Open SQL Server Configuration Manager using the SQLServerManager<version>.msc command, where <version> is the version number of your SQL Server instance.
For more information about locating the correct version number, see Microsoft Documentation.
Expand SQL Server Network Configuration > Protocols for MSSQLSERVER
If your SQL Server instance is named differently to MSSQLSERVER, select the appropriate instance name.
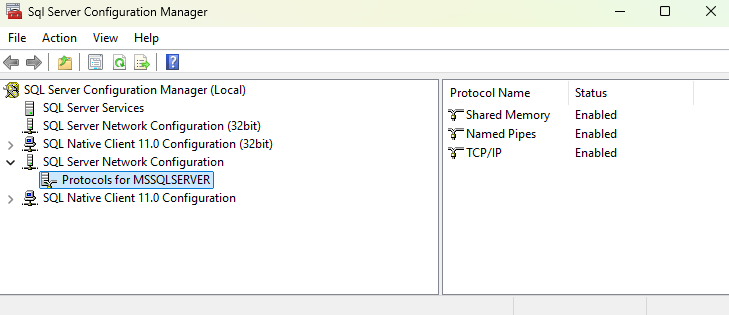
Right-click Protocols for MSSQLSERVER and select Properties.
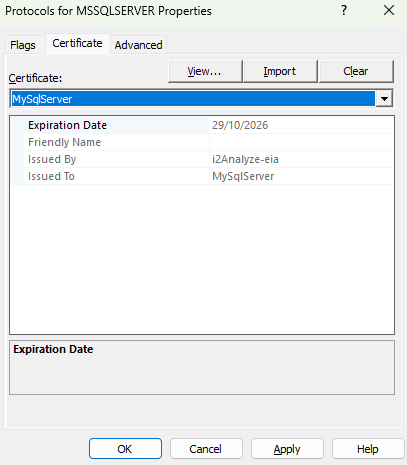
Select the Certificate tab.
In the drop-down list, select the installed certificate from the previous step.
The certificate will be listed by the Common Name (CN) value the same as the DB_FQDN property in variables.conf.
Select the Flags tab.
Set the Force Encryption option to Yes
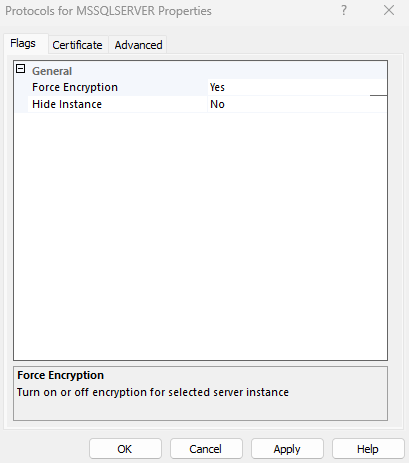
Click OK to save the changes.
Restart the SQL Server service to apply the changes.
Configuring i2 Explore for iBase to use secure SQL Server connections
To configure i2 Explore for iBase to use secure connections to SQL Server, follow these steps:
Open the variables.conf file located at: <installation_location>/explore-for-ibase/analyze-deployment-tooling/configs/explore-for-ibase/utils/variables.conf
Set the following properties: DB_SSL_CONNECTION="true"
Navigate to the <installation_location>/explore-for-ibase/analyze-deployment-tooling directory in a terminal, and run the following command: setup -t deploy