
Working with layers and markers in i2 Overwatch
In i2 Overwatch, map markers are listed in the Layers panel under the layer that contains them. This makes it easier to see how markers are grouped on the map and to manage marker selection alongside layer selection.
You can use the Layers panel to organize layers and markers, create nested layers, move or merge items, show or hide content, and lock layers to prevent structural changes.
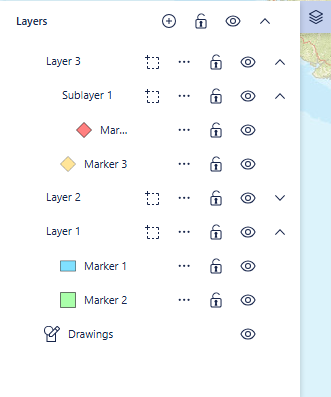
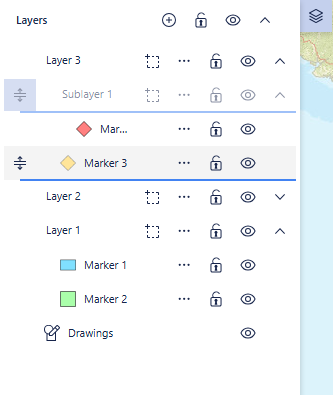
Markers in the Layers panel
Each marker appears as a child item beneath its layer in the Layers panel.
When you add a marker on the map, i2 Overwatch decides where to place it based on the current layer selection:
If no layer is selected, the marker is added to a new layer.
If exactly one layer is selected, the marker is added to that layer.
If multiple layers are selected, the marker is added to a new layer.
Partially selected layers are treated in the same way as fully selected layers. If exactly one layer is selected, whether fully or partially, new markers are added to that layer.
If the selected layer is locked, the new marker is added to a new unlocked layer instead.
Selecting markers and layers
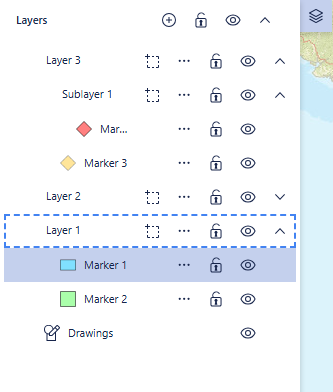
Marker selection is synchronized between the map and the Layers panel.
If you select a marker on the map, the same marker is selected in the Layers panel.
If you select a marker in the Layers panel, the same marker is selected on the map.
Layer selection updates automatically to reflect marker selection:
If you select one marker in a layer that contains more than one marker, the layer shows a partial selection state.
If a layer contains only one marker and that marker is selected, the layer is shown as fully selected.
Marker actions from the Layers panel
Markers in the Layers panel provide the same menu actions that are available from the marker context menu on the map.
This means that you can open the marker action menu directly from the layer entry instead of switching back to the map.
Renaming layers and adding sublayers
You can rename user-defined layers in the Layers panel.
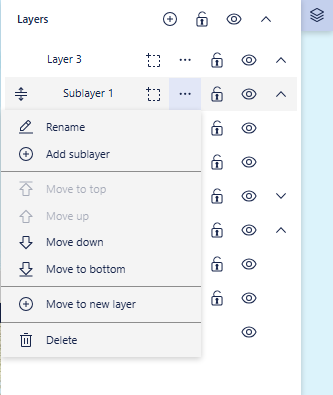
Select the layer name to edit it directly, or use the three-dot menu on the layer.
Child layers can be renamed in the same way as top-level layers.
You can also create nested layers from an existing layer.
Open the three-dot menu on a layer and select the option to add a sublayer.
The new sublayer is created inside the selected parent layer.
New sublayers appear indented beneath their parent layer in the Layers panel.
A new sublayer is added at the top of its parent layer's child list.
Sublayer names are assigned sequentially within their parent layer.
Child layers behave like other user-defined layers. You can rename them, delete them, move them, and create further nested layers inside them.
You can expand and collapse both parent layers and sublayers to show or hide their contents in the Layers panel.
Expanding a layer shows its child layers and markers.
Collapsing a layer hides its child layers and markers from the panel until you expand it again.
New layers that are created from a selection or by merging layers are expanded by default.
Showing and hiding layers and markers
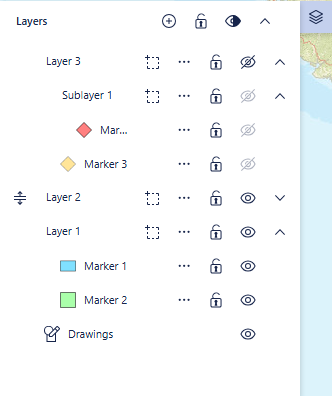
You can control the visibility of layers and markers from the Layers panel.
Use the top-level eye icon to show or hide all layers and markers.
Use the eye icon on a layer to show or hide that layer and all of its children.
Use the eye icon on a marker to show or hide that marker.
If some layers or markers are hidden, the top-level eye icon shows a partial state.
If you select markers or layers, the three-dot menu can include Hide selection or Show selection for the current selection.
If a layer is hidden, its child items are also hidden. While a parent layer is hidden, the eye icons for child layers and markers are disabled.
Moving layers and markers
You can reorganize layers and markers directly in the Layers panel.
Drag a layer or marker by using its drag handle.
Drop a marker into a different layer, or move it to a different position inside its current layer.
Drop a layer into another layer to create a nested structure, or move it out of a parent layer to a higher level.
When you move a layer, all of its child layers and markers move with it.
You can also use the three-dot menu to move items without dragging them.
For a marker, the menu can include options to move it to the top or bottom of its layer, or move it up or down within that layer.
For a layer, the menu can include options to move it to the top or bottom of its current level, or move it up or down among its sibling layers.
If you select multiple layers, markers, or both, you can move the selected items together. When a selection contains markers, they must be moved into a layer.
Creating a layer from a selection
You can create a new top-level layer from the current selection in the Layers panel.
Select one or more layers, nested layers, markers, or a combination of these items.
Open the three-dot menu for an item that is part of the current selection.
Select Create layer from selection.
i2 Overwatch creates a new layer at the top level and moves the selected items into it.
The moved items become siblings in the new layer, even if they were previously in different parts of the hierarchy.
The original parent layers are updated to remove the moved items.
Empty parent layers are left in place.
The new layer is selected after it is created.
The new layer is expanded by default.
If you select markers on the map, you can also create a layer from that marker selection from the marker context menu.
Merging layers
You can merge two or more selected layers into a single layer.
Select two or more layers in the Layers panel.
Open the three-dot menu on one of the selected layers.
Select Merge layers.
The merged layer keeps the name and visibility state of the top-most selected layer.
All markers from the selected layers are added to the merged layer in top-to-bottom order.
If the selected layers contain nested layers, the nested structure is flattened and only the descendant markers are kept.
The merged layer is inserted where the top-most selected layer was.
The original selected layers are removed after the merge.
The merged layer is expanded by default.
The layer selection is cleared after the merge.

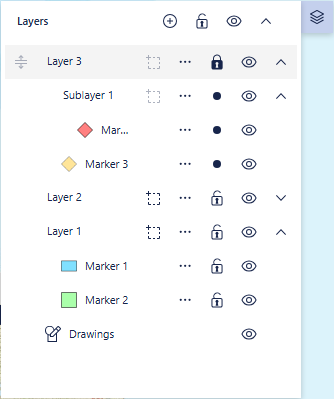
Locking layers and markers
You can lock user-defined layers and markers to prevent structural changes.
A locked item cannot be moved, renamed, deleted, or changed by other structural actions.
Child layers and markers inherit the locked state of a locked parent layer.
Locked rows keep their drag handles, but the handles are disabled.
You can still use visibility controls on locked items. Hiding and showing layers and markers remains available even when they are locked.
If a selection contains any locked items, structural actions for that selection are unavailable. For example, you cannot move the selection or create a new layer from it.
Notes
If you delete a layer, all nested child layers and markers in that layer are deleted as well.
This marker display behavior in the Layers panel applies to i2 Overwatch and not to regular Analyst's Notebook.