
Importing temporal data into i2 Overwatch
You can import historic location data for a marker in i2 Overwatch. The imported data consists of latitude, longitude, and optional timestamp entries.
The imported data is displayed on the map as either:
a set of standalone points
a track, where the points are connected by a line in timestamp order
You can import one set of standalone points and one track per marker.
Data format
Historic location data can be imported from two file types: GPX and CSV.
For both GPX and CSV data, the latitude, longitude, and timestamp entries are extracted, and any other data in the file is discarded. Timestamp entries are required to create a track.
GPX example
<?xml version="1.0" encoding="UTF-8"?>

<gpx version="1.1" xmlns="http://www.topografix.com/GPX/1/1"
	xmlns:xsi="http://www.w3.org/2001/XMLSchema-instance"
	xsi:schemaLocation="http://www.topografix.com/GPX/1/1 http://www.topografix.com/GPX/1/1/gpx.xsd">
	<metadata>
		<name>London Landmarks Walk (Realistic Order)</name>
		<time>2026-01-29T10:00:00Z</time>
	</metadata>
	<trk>
		<name>London Landmarks Route (Realistic)</name>
		<trkseg>
			<trkpt lat="51.499292" lon="-0.127309">
				<time>2026-01-29T10:00:00Z</time>
				<name>Westminster Abbey</name>
			</trkpt>
			<trkpt lat="51.499479" lon="-0.124809">
				<time>2026-01-29T10:04:00Z</time>
				<name>Palace of Westminster</name>
			</trkpt>
			<trkpt lat="51.500729" lon="-0.124625">
				<time>2026-01-29T10:08:00Z</time>
				<name>Big Ben (Elizabeth Tower)</name>
			</trkpt>
			<trkpt lat="51.503324" lon="-0.119543">
				<time>2026-01-29T10:33:27.579143Z</time>
				<name>London Eye</name>
			</trkpt>
			<trkpt lat="51.501364" lon="-0.141890">
				<time>2026-01-29T11:32:12.268661Z</time>
				<name>Buckingham Palace</name>
			</trkpt>
			<trkpt lat="51.508039" lon="-0.128069">
				<time>2026-01-29T12:46:44.027296Z</time>
				<name>Trafalgar Square</name>
			</trkpt>
			<trkpt lat="51.513845" lon="-0.098351">
				<time>2026-01-29T13:12:36.023978Z</time>
				<name>St Paul's Cathedral</name>
			</trkpt>
			<trkpt lat="51.508098" lon="-0.075977">
				<time>2026-01-29T13:30:44.157010Z</time>
				<name>Tower of London</name>
			</trkpt>
			<trkpt lat="51.505456" lon="-0.075356">
				<time>2026-01-29T15:34:44.157010Z</time>
				<name>Tower Bridge</name>
			</trkpt>
		</trkseg>
	</trk>
</gpx>
CSV example
latitude,longitude,timestamp
51.499292,-0.127309,2026-01-29T10:00:00Z
51.499479,-0.124809,2026-01-29T10:04:00Z
51.500729,-0.124625,2026-01-29T10:08:00Z
51.503324,-0.119543,2026-01-29T10:33:27.579143Z
51.501364,-0.141890,2026-01-29T11:32:12.268661Z
51.508039,-0.128069,2026-01-29T12:46:44.027296Z
51.513845,-0.098351,2026-01-29T13:12:36.023978Z
51.508098,-0.075977,2026-01-29T13:30:44.157010Z
51.505456,-0.075356,2026-01-29T15:34:44.157010Z
Importing temporal data
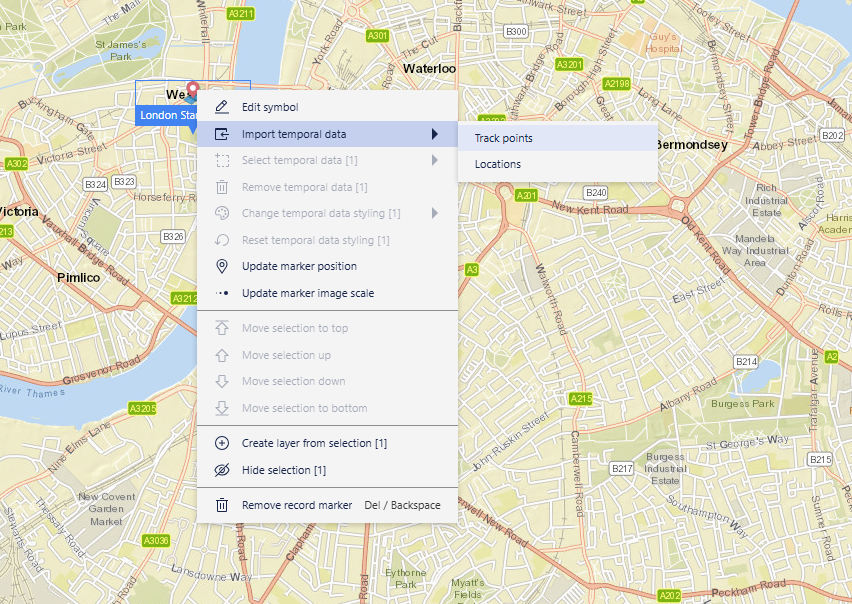
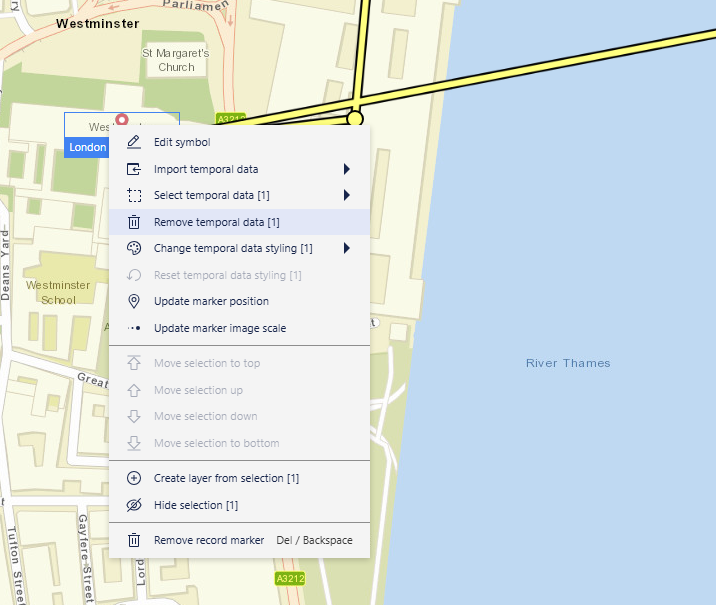
Step 1: Right-click the map marker, select Import temporal data, and then select either Track points or Locations.
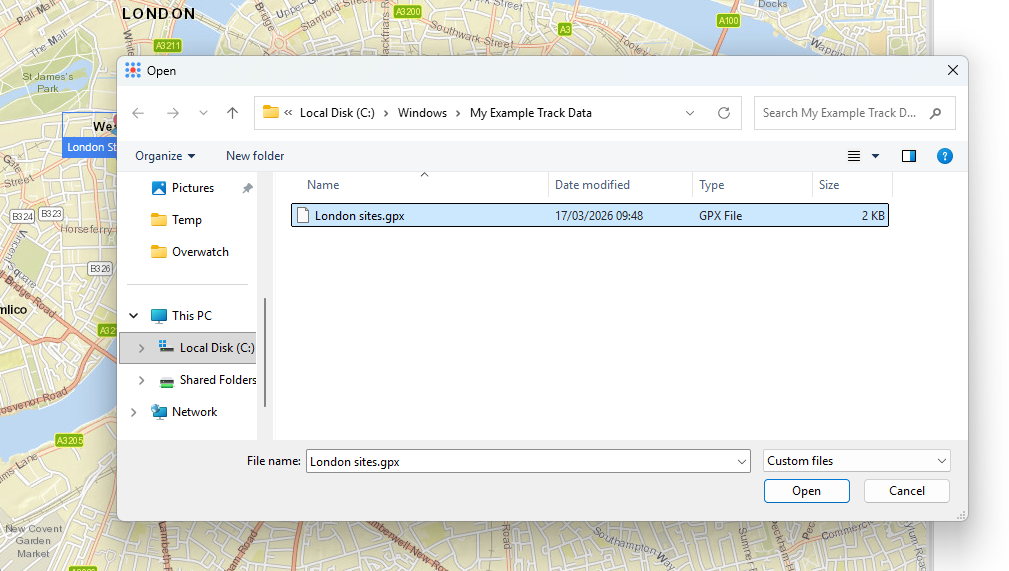
Step 2: In the file picker, select the .GPX or .CSV file you want to import, and then click Open.
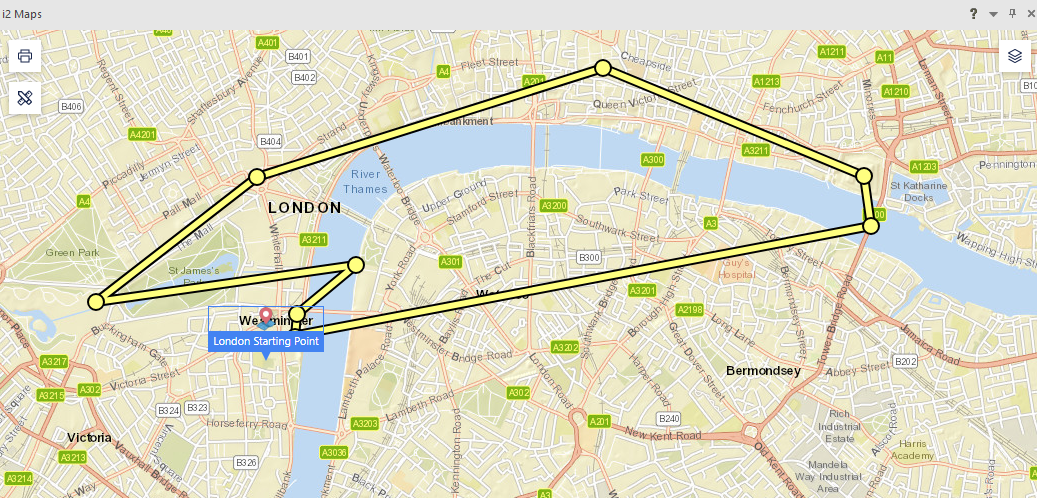
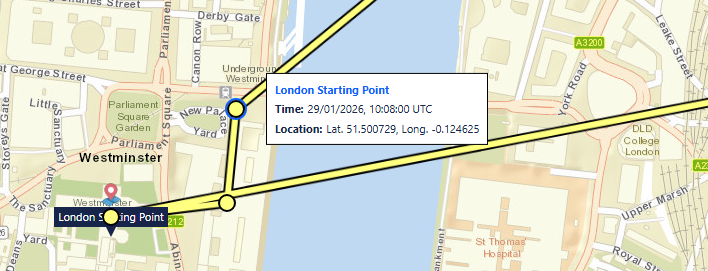
Step 3: The imported track points or locations are added to the marker on the map.
Selecting the track line shows a summary for the entire track.
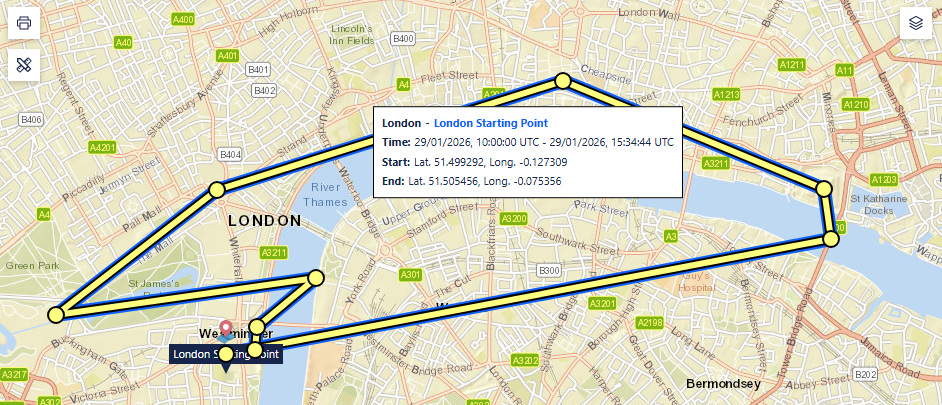
Selecting a point shows a popover with its position and timestamp.
You can clear the imported temporal data if you no longer need it.
For information about changing the appearance and behavior of imported tracks, see Configuring tracks.
GPX requirements and limitations
When you import GPX data:
Track imports use track points from the first GPX track only.
Location imports can use waypoints and track points.
Latitude and longitude values are required for all imported points.
To create a track, at least two track points are required.
If timestamps are present for a track, they must be present for all points in that track.
GPX routes and other optional GPX fields, such as descriptions and symbols, are not imported.