
Deploying and upgrading using the i2 Explore Administration Console
How to deploy or upgrade the i2 Explore for iBase application using the i2 Explore Administration Console.
Before you begin
This short video provides a walkthrough of how to deploy i2 Explore for iBase.
You can link to the video directly here.
About the Administration Console
The i2 Explore Administration Console is a web-based interface for managing the lifecycle of a single i2 Explore for iBase deployment. It provides a structured view of service state, configuration values, deployment task execution and history, and administrative checks, removing the need for manual command-line operations and direct file editing.
Starting the Administration Console
Open a Windows Command Prompt in the analyze-deployment-tooling directory.
Run AdminConsole.exe.
The Administration Console starts and displays the local address to use to open it in a browser. By default, the console is accessible only on the machine where AdminConsole.exe is running. To configure remote access, see Enabling remote access for the Administration Console.
Note: The Administration Console displays a warning if the configured port is already in use. To resolve a port conflict, set the ADMIN_CONSOLE_PORT variable in <installation_location>/analyze-deployment-tooling/configs/explore-for-ibase/utils/variables.conf.
Open the displayed address in a browser.
To stop the Administration Console, press Ctrl+C in the Command Prompt window used to launch it.
Enabling remote access for the Administration Console
By default, the Administration Console is accessible only on the machine where AdminConsole.exe is running. To enable remote access, you must create an Administration Console password and provide a signed TLS certificate and private key for the i2 Explore host machine, along with the CA trust certificate that was used to sign this.
You can configure these requirements using the Administration Console (the recommended approach), or using the command line.
Enabling remote access using the Administration Console
Start the Administration Console and open it in a browser on the local machine.
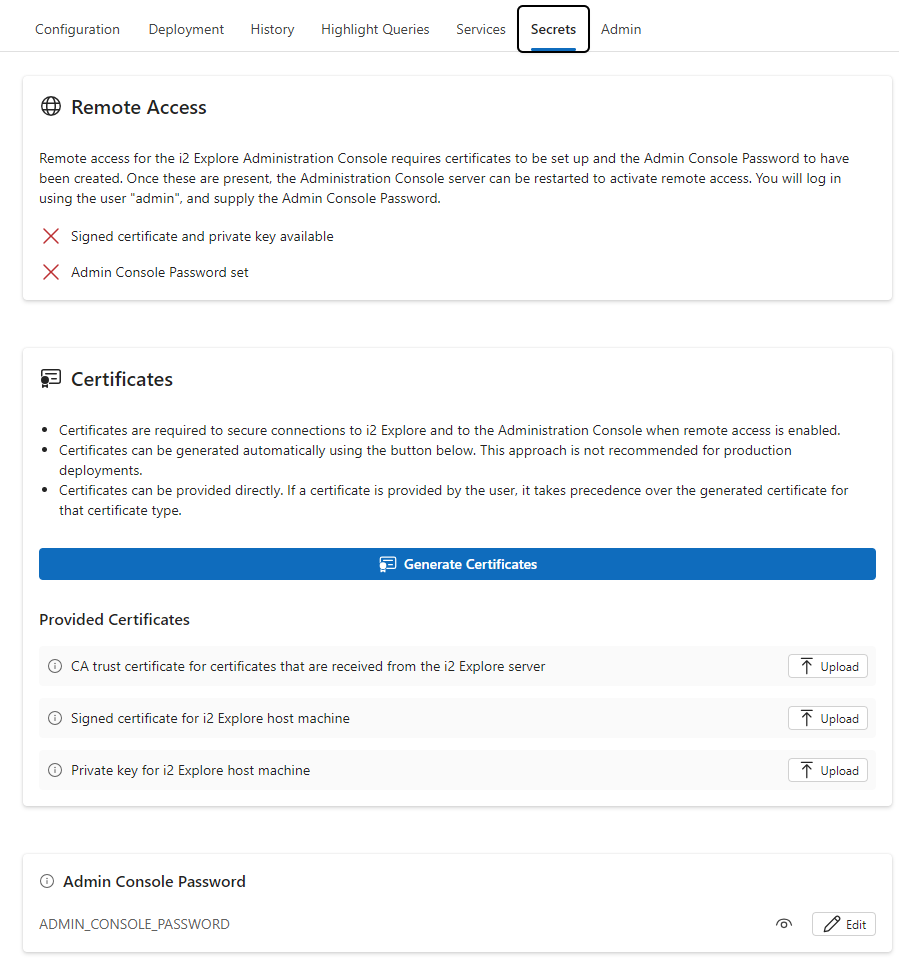
Select the Secrets tab.
In the Certificates panel, upload the CA trust certificate, the TLS certificate, and private key for the i2 Explore host machine, or click Generate Certificates to create a self-signed certificate.
Note: You can replace a generated certificate with a provided certificate at a later time, if necessary.
In the Admin Console Password panel, click Edit and set a password for the Administration Console.
Refresh the page and check the state of the Remote Access panel to confirm that remote access is ready to be enabled.
Stop and restart AdminConsole.exe.
The Administration Console displays the address to use for remote access.
Open the displayed address in a browser. When prompted, log in with the username admin and the password you set in step 4.
Enabling remote access using the command line
Provide a CA trust certificate, a TLS certificate, and private key for the i2 Explore host machine.
To generate these automatically, run setup -t generateSecrets from the analyze-deployment-tooling directory.
To supply your own certificates, see Configuring TLS Connection to iBase.
From the analyze-deployment-tooling directory, run the following command to set the Administration Console password, replacing <password> with your chosen password:
setup -t setAdminConsolePassword -p <password>Stop and restart AdminConsole.exe to enable remote access.
Configuring the deployment
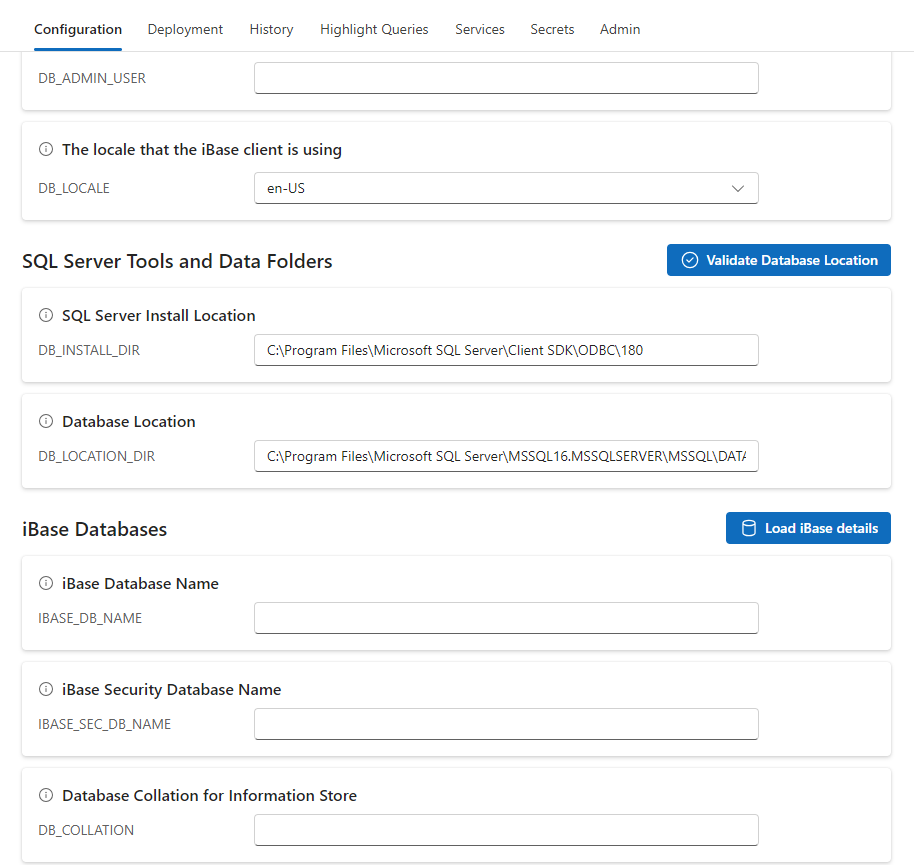
Select the Configuration tab.
Check that the default configuration values are correct for your deployment.
To populate the database fields automatically, click Load iBase Details.
Before using this feature, ensure that iBase Database Port is set to the correct SQL Server port (or that iBase Database Instance identifies the correct SQL Server instance), and that SQL Server Install Location is set and correct.
Note: Use iBase Database Port rather than iBase Database Instance for production deployments.
Supply a database administrator username and password when prompted; these credentials are not stored. The Administration Console populates the iBase Database Name and iBase Security Database Name fields with the available iBase data and security databases on the SQL Server instance. Select the databases to use from the drop-down lists.
When you select an iBase Database Name, the Administration Console automatically sets Database Collation for Information Store to the collation used by the selected database, and sets Database Location to the same directory as the selected iBase database file.
To verify that the SQL Server instance can write to the configured location, click Validate Database Location.
Click Save Valid Changes to save your configuration.
Note: If you are upgrading an existing deployment, the Configuration tab is pre-populated with your existing settings.
For more information, see Understanding the Administration Console.
Configuring server certificates
You can provide your own certificates for the application server by uploading them on the Secrets tab. The following files are required:
CA trust certificate — The CA trust certificate for certificates received from the i2 Explore server, used to verify the identity of the server.
Signed certificate for the i2 Explore host machine — The certificate used to secure the connection to the i2 Explore service. This certificate must be signed by the CA trust certificate.
Private key for the i2 Explore host machine — The private key used to secure the connection to the i2 Explore service.
If you do not supply certificates, the Administration Console generates them automatically when you start the deployment. You can also generate certificates manually by clicking Generate Certificates. Generated certificates are not recommended for production environments.
Deploying i2 Explore for iBase
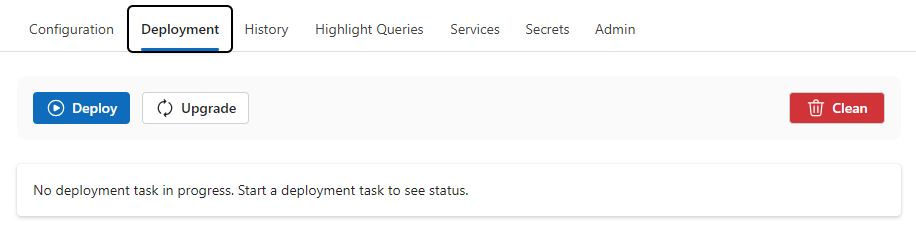
Select the Deployment tab.
Click Deploy to start the deployment.
For the first deployment, supply credentials for a database user with sysadmin permissions when prompted. For information about how these credentials are used, see Database Permissions Summary.
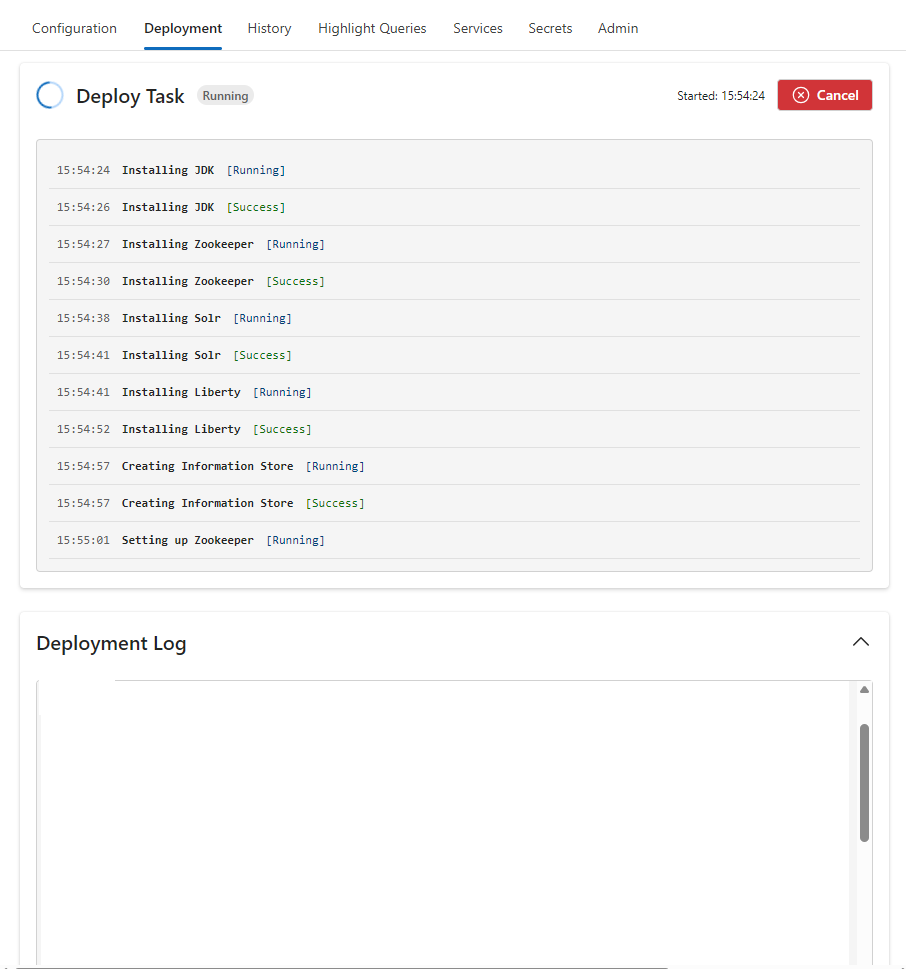
Monitor the progress of the deployment in the Deployment Task panel. For detailed information, see the Deployment Log panel.
Upgrading i2 Explore for iBase
This video provides a detailed walkthrough of how to upgrade an existing i2 Explore for iBase deployment to the latest version:
You can link to the video directly here.
Select the Deployment tab.
Click Upgrade to start the upgrade.
Supply credentials for a database user with sysadmin permissions when prompted. For information about how these credentials are used, see Database Permissions Summary.
Monitor the progress of the upgrade in the Upgrade Task panel. For detailed information, see the Deployment Log panel.
Results
When the deployment is complete, the Deployment Log panel contains an entry in the following form, indicating the URL at which i2 Explore for iBase is accessible:
Explore for iBase available at URL: <your_url>Exploring the Deployment
For more information, see Exploring the i2 Explore for iBase Deployment.