Installing i2 TextChart Server
Installing the i2 TextChart Server system involves two steps:
Choose a target system and install and start the manager software.
Choose one or more systems on which to install the worker software.
Manager installation
Before you install the manager software, make sure you have the following information, which you will need during the installation process:
Installation directory: A directory where the software will be installed. The directory's file system should have at least 2GB of free space.
Client port: A network port where the REST API will communicate. Choose an unused port on your system.
Admin port: A network port where the administration user interface will be hosted. Choose an unused port on your system.
Worker service port: A network port that the worker nodes will contact to interact with the manager. Choose an unused port on your system.
Queue directory: A directory where any backlog of documents submitted for processing will be written. If left unspecified during installation, a directory will be created under the installation directory.
The file system where this directory is located should have as much free space as you anticipate needing to store submitted documents until they are processed. If the space is full, the manager rejects documents until more becomes available.
License key file: An XML file that you received from i2 containing your license for the i2 TextChart Server software. The software will install and can be administered without a license key, but it will not process documents without a valid license.
On Linux, you must run the manager installation with root privileges. (Use the sudo command to start the process.)
When the manager software is installed, you must start the service, which is named rosokamgr on Linux or RosokaManager on Windows. The service is set to start automatically at operating system startup.
Start the service by issuing the command appropriate for your system. For example, the following command starts the service on most variants of Linux:
sudo service rosokamgr startWhile on Windows, you can use this command:
net start RosokaManagerOn Windows, you can also use the Task Manager or the Services control panel to start, stop, and manage the service.
Verify that the manager is running before you proceed to installing workers.
Worker installation
Before you install the worker software, make sure you have the following information:
Manager host: The hostname or IP address of the system on which you installed the manager software.
Worker service port: The network port that you specified for the same setting on the manager node.
Worker name: The name of this worker node. Typically, this value is the network hostname of the node, but you can choose something else.
Worker port: A network port that the manager can use to communicate with the worker. Choose an unused port on your system.
Threads: The number of threads to use when processing documents on this node. Each thread processes one document, so the thread count determines how many simultaneous documents can be processed.
The default value of 0 automatically uses all available cores for processing.
On Linux, you must run the worker installation with root privileges. (Use the sudo command to start the process.)
During installation, the procedure attempts to verify that the provided manager host and port information is correct. The manager service does not have to be running when you install the worker software, but the verification will fail.
When the worker software is installed, you must start the service, which is named rosokawrk on Linux or RosokaWorker on Windows. The service is set to start automatically at operating system startup.
Start the service by issuing the command appropriate for your system. For example, the following command starts the service on most variants of Linux:
sudo service rosokawrk startWhile on Windows, you can use this command:
net start RosokaWorkerOn Windows, you can also use the Task Manager or the Services control panel to start, stop, and manage the service.
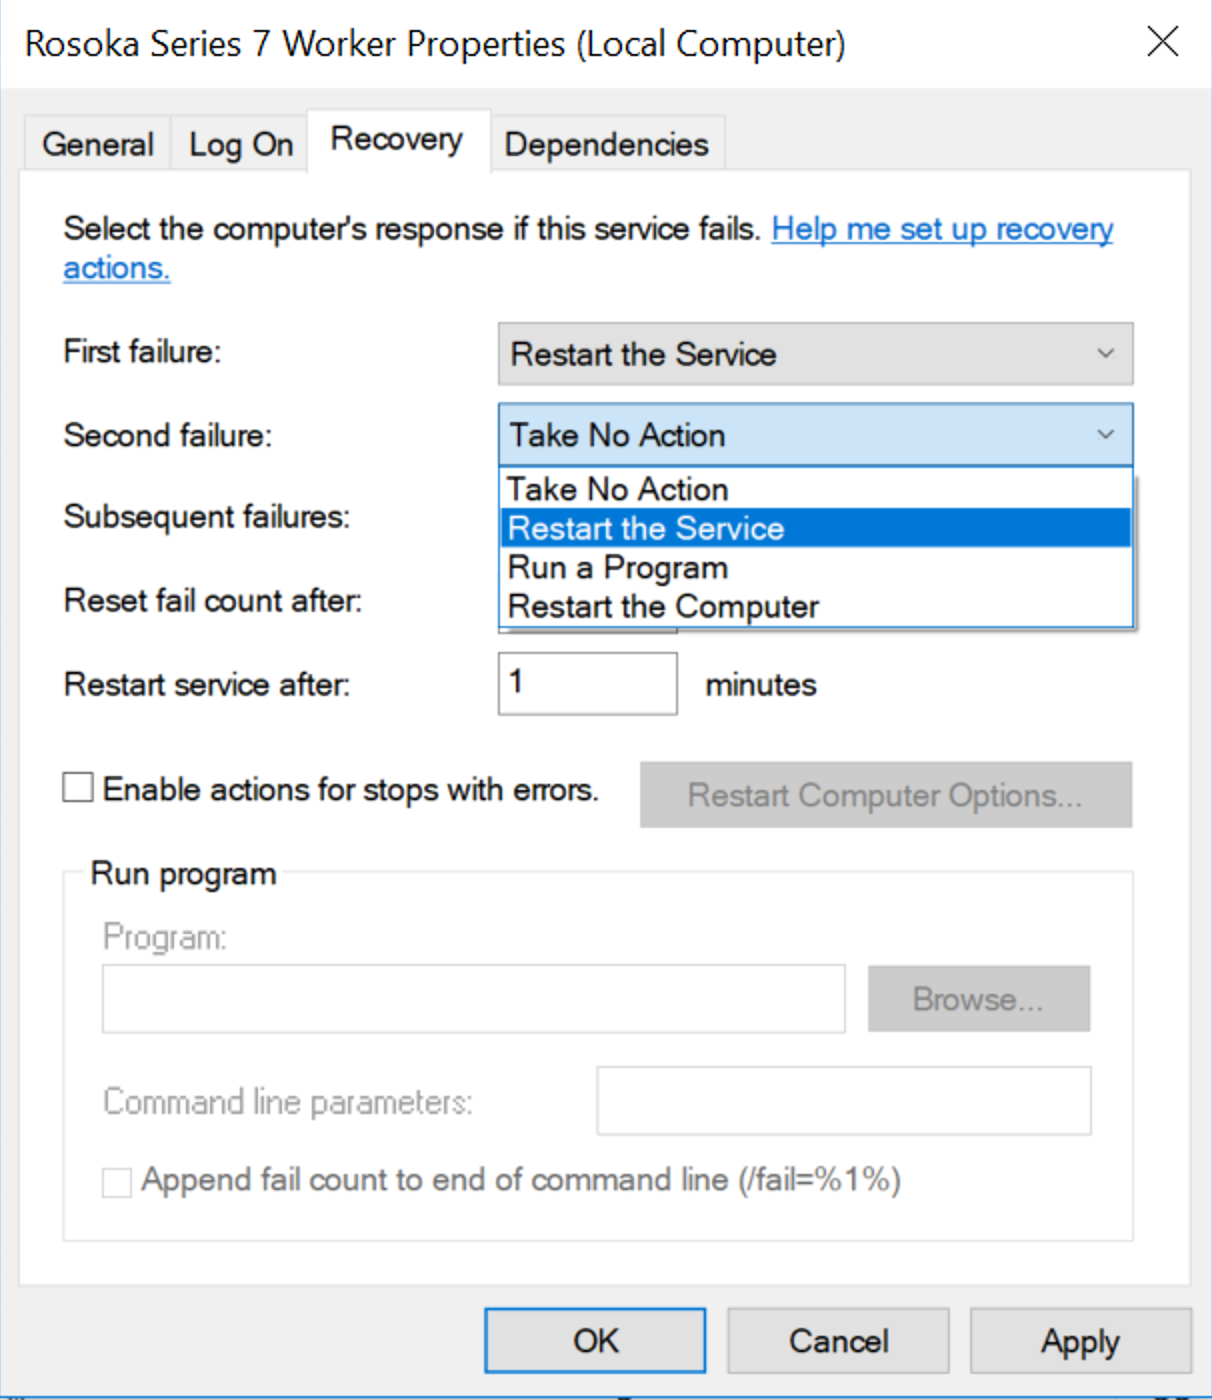
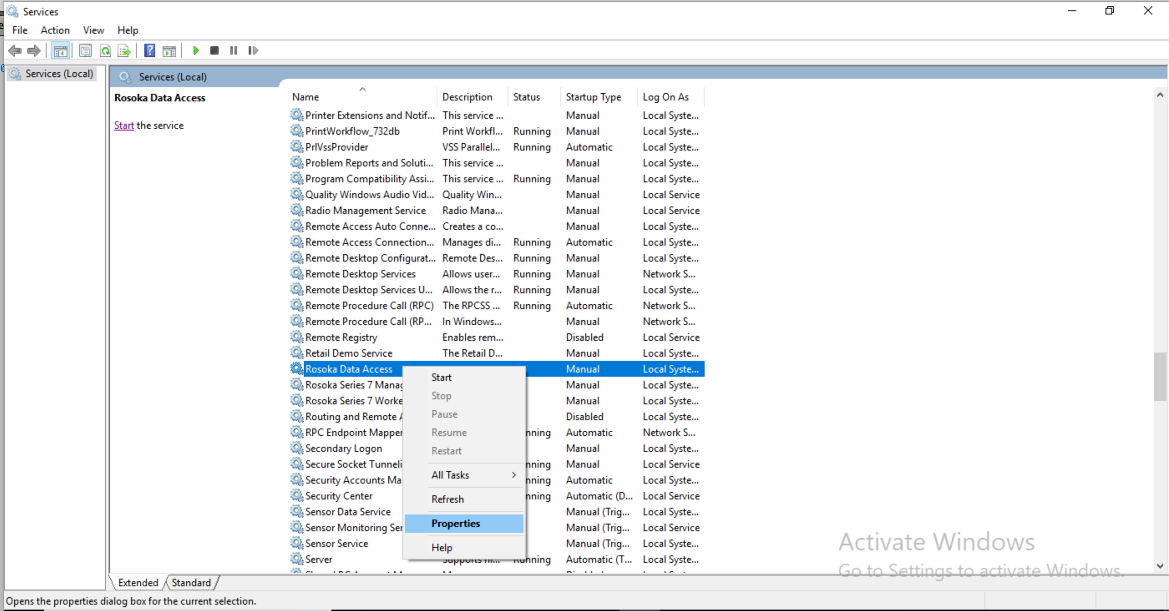
Also on Windows, you must configure the services to restart automatically in the event of failure. To do so, access the services by launching the Services control panel:

Locate the "i2 TextChart Server Worker" service, and view its properties:
In the Properties dialog, open the Recovery tab, and set the First failure, Second failure, and Subsequent failures settings to Restart the Service: