
Processing documents using input connectors
The i2 TextChart Server manager can discover and queue documents for processing through small pieces of dynamically loaded software called input connectors. These connectors run on the manager, and you can administer them through the manager.
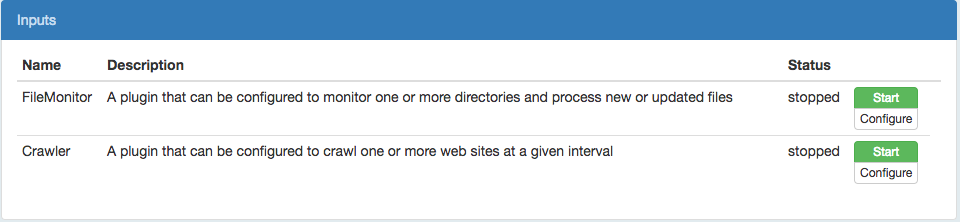
i2 TextChart Server is supplied with two input connectors: the file monitor, and the crawler.
File monitor
The file monitor input connector lets you set up one or more directories on the manager to be monitored for new and changed files. These files are then queued up for processing by a specified cluster of worker nodes.
To set up the file monitor, open the Inputs page of the manager's user interface. You'll see a list of the available input connectors. Find the FileMonitor connector and click Configure.
The page lists all the directories that are currently being monitored, with the option to edit or delete directories from the list. To add a directory to monitor, click Add.
Enter the following information about the directory to be monitored:
Name: A descriptive name for the directory. Use a name that helps you to identify the type of content that is being processed.
Path: The absolute path to the directory, including the directory itself.
Recurse: Select this option to explore not only the directory at the specified path, but also any subdirectories.
Doc ID: For each file in the directory, a document identifier is passed to the output connector configured for the cluster. This setting determines what the identifier looks like:
relative: The document identifier is the path to the file from the monitored directory. For example, if the directory /a/b/c is monitored, and a file is found at /a/b/c/d/file.txt, then the document identifier is d/file.txt.
absolute: The document identifier is the absolute path of the file.
name: The document identifier is the name of the file, without any preceding directory path.
Format Conversion: Select this option to submit files as raw data, so that i2 TextChart Server determines their encoding and format automatically. When the option is not selected, the server assumes the files to contain only UTF-8 encoded text.
Interval: The monitor interval. Use monitor to process any new or changed files in the directory path immediately, or specify a time interval in the form DDdHHhMMmSSs, where DD is the number of days, HH is the number of hours, MM is the number of minutes, and SS is the number of seconds.
You must specify at least one unit. For example, the following are all valid interval specifications: 4d3h, 30m, 1d12h30m20s.
Cluster: The cluster to use for processing. If left blank, the default cluster is used.
Post-process: Determines what happens to a file after it is processed. The options are:
none: Do nothing to the file after it is processed.
delete: Delete the file after it is processed.
move: Move the file to another directory after it is processed. The Move Path setting determines the destination.
Move Path: If Post-process is set to move, then this path determines where the processed files move to. If files were found in subdirectories of Path, that structure is maintained so that the resulting directory mirrors the original source directory.
To start the file monitor input connector, click Start. To learn how to start the file monitor when the manager starts up, see Manager Settings.
Crawler
The crawler input connector lets you explore one or more websites to a specified depth at regular intervals, and to send all text content for processing.
To set up the crawler, open the Inputs page of the manager's user interface. You'll see a list of the available input connectors. Find the Crawler connector and click Configure.
The page lists all the crawlers that are currently configured, with the option to edit or delete them. To add a new crawler, click Add.
Enter the following information for the crawler:
Name: A descriptive name for the crawler. Use a name that relates to the site or sites being crawled.
Cluster: The cluster to use for processing. If left blank, the default cluster is used.
Interval: The time interval between crawls. Specify a time interval in the form DDdHHhMMmSSs, where DD is the number of days, HH is the number of hours, MM is the number of minutes, and SS is the number of seconds.
You must specify at least one unit. For example, the following are all valid interval specifications: 4d3h, 30m, 1d12h30m20s.
Max crawl depth: The maximum distance away from the original URL that the crawler explores. A depth of zero makes the crawler explore only the specified site. A depth of one makes the crawler follow links in the specified site and crawl those pages too.
Avoid setting this value too high, as the number of pages to crawl can rise exponentially with the depth.
Max pages: The maximum number of pages that the crawler should explore for the crawler. Set a value of zero to indicate no limit.
Crawl only same domain: Select this option to keep the crawler on the same domain as the specified site. In other words, prevent the crawler from following links to a different domain.
Sites: A newline-separated list of fully qualified website URLs for this crawler to explore. You can provide any number of URLs, and the crawler uses the settings for all of them. To use different settings, you can create as many crawlers as you need.
If your manager is behind a network proxy, you might need to modify the proxy settings. Click Proxy Settings to make changes to the following values:
Proxy host: The hostname or IP address for the proxy.
Proxy port: The network port for the proxy.
Proxy user: If required, the name of a user with access the proxy.
Proxy password: If required, the password of the specified user.
By default, the crawler input connector assumes that no proxy is required.
To start the crawler connector, click Start. To learn how to start the crawler when the manager starts up, see Manager Settings.