Charting extraction results
After i2 TextChart has imported and processed a collection of documents and you have curated the results, you can add the extracted entities and links to an Analyst's Notebook chart. TextChart supports sending results to the chart separately or in bulk.
Sending entities to a chart
TextChart provides three options for sending entities to a chart. You can specify them individually, choose all entities of the same type, or simply send all the extracted entities at once.
Sending a single entity
To send a single entity from the Document View to the current chart, you can use the pop-up menu for that entity in the Entities list on the left of the window, or the Send To Chart button from the entity details pane on the right of the window.
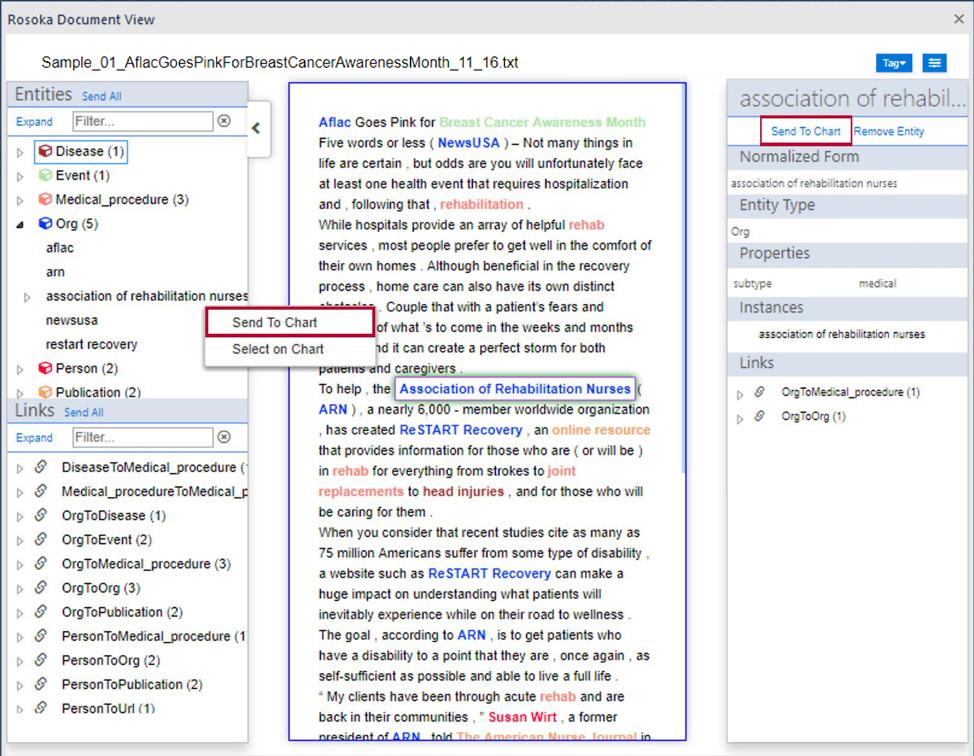
If an extracted entity is already on the chart, you can use the same pop-up menu to select it there.
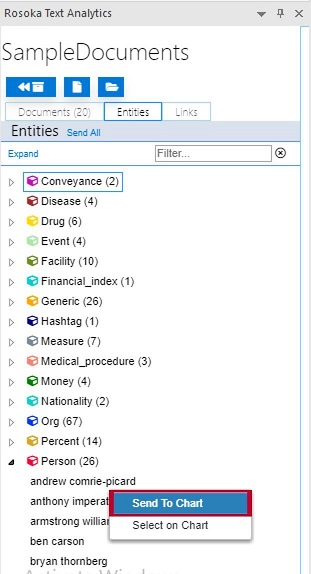
Sending several entities
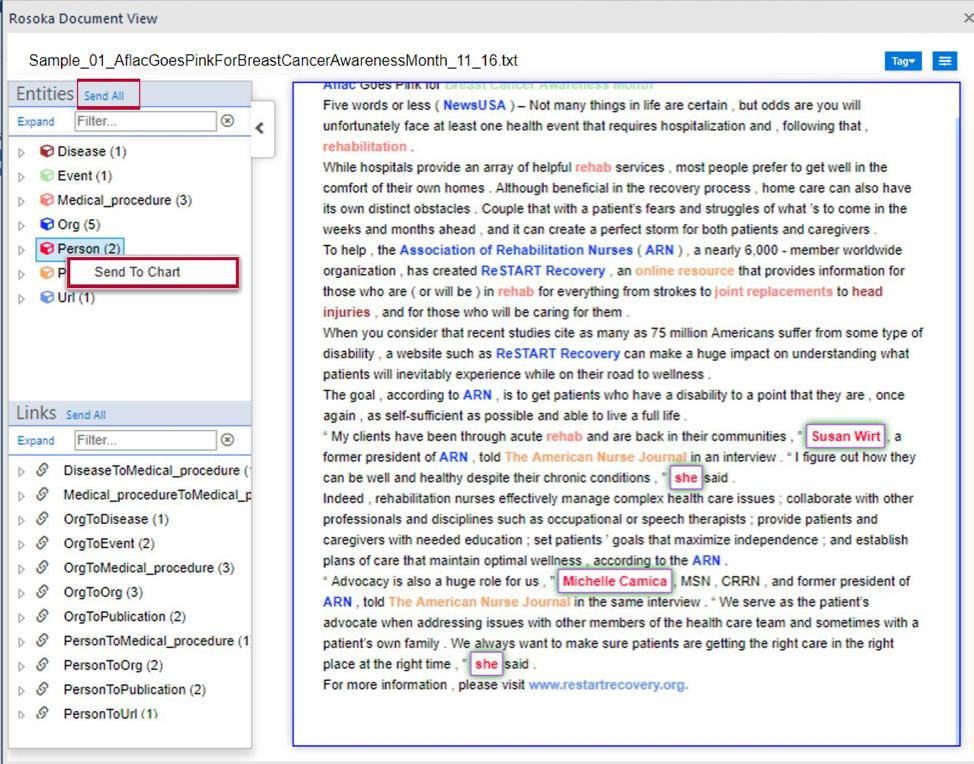
To send all the entities of the same type from the Document View to a chart, you can use the pop-up menu for that entity type in the Entities list. Alternatively, to send all the entities extracted from the document to the chart, you can click the Send All button at the top of the list.
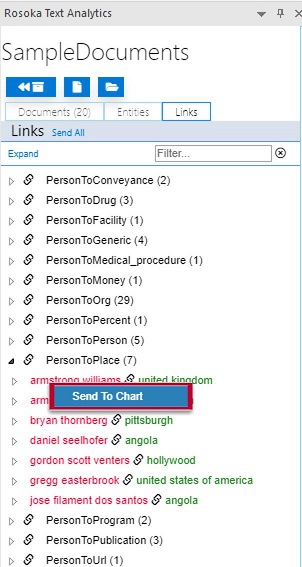
Sending links to a chart
TextChart provides the same three options for sending extracted links to the chart as it does for sending entities, and you use them in the same way.
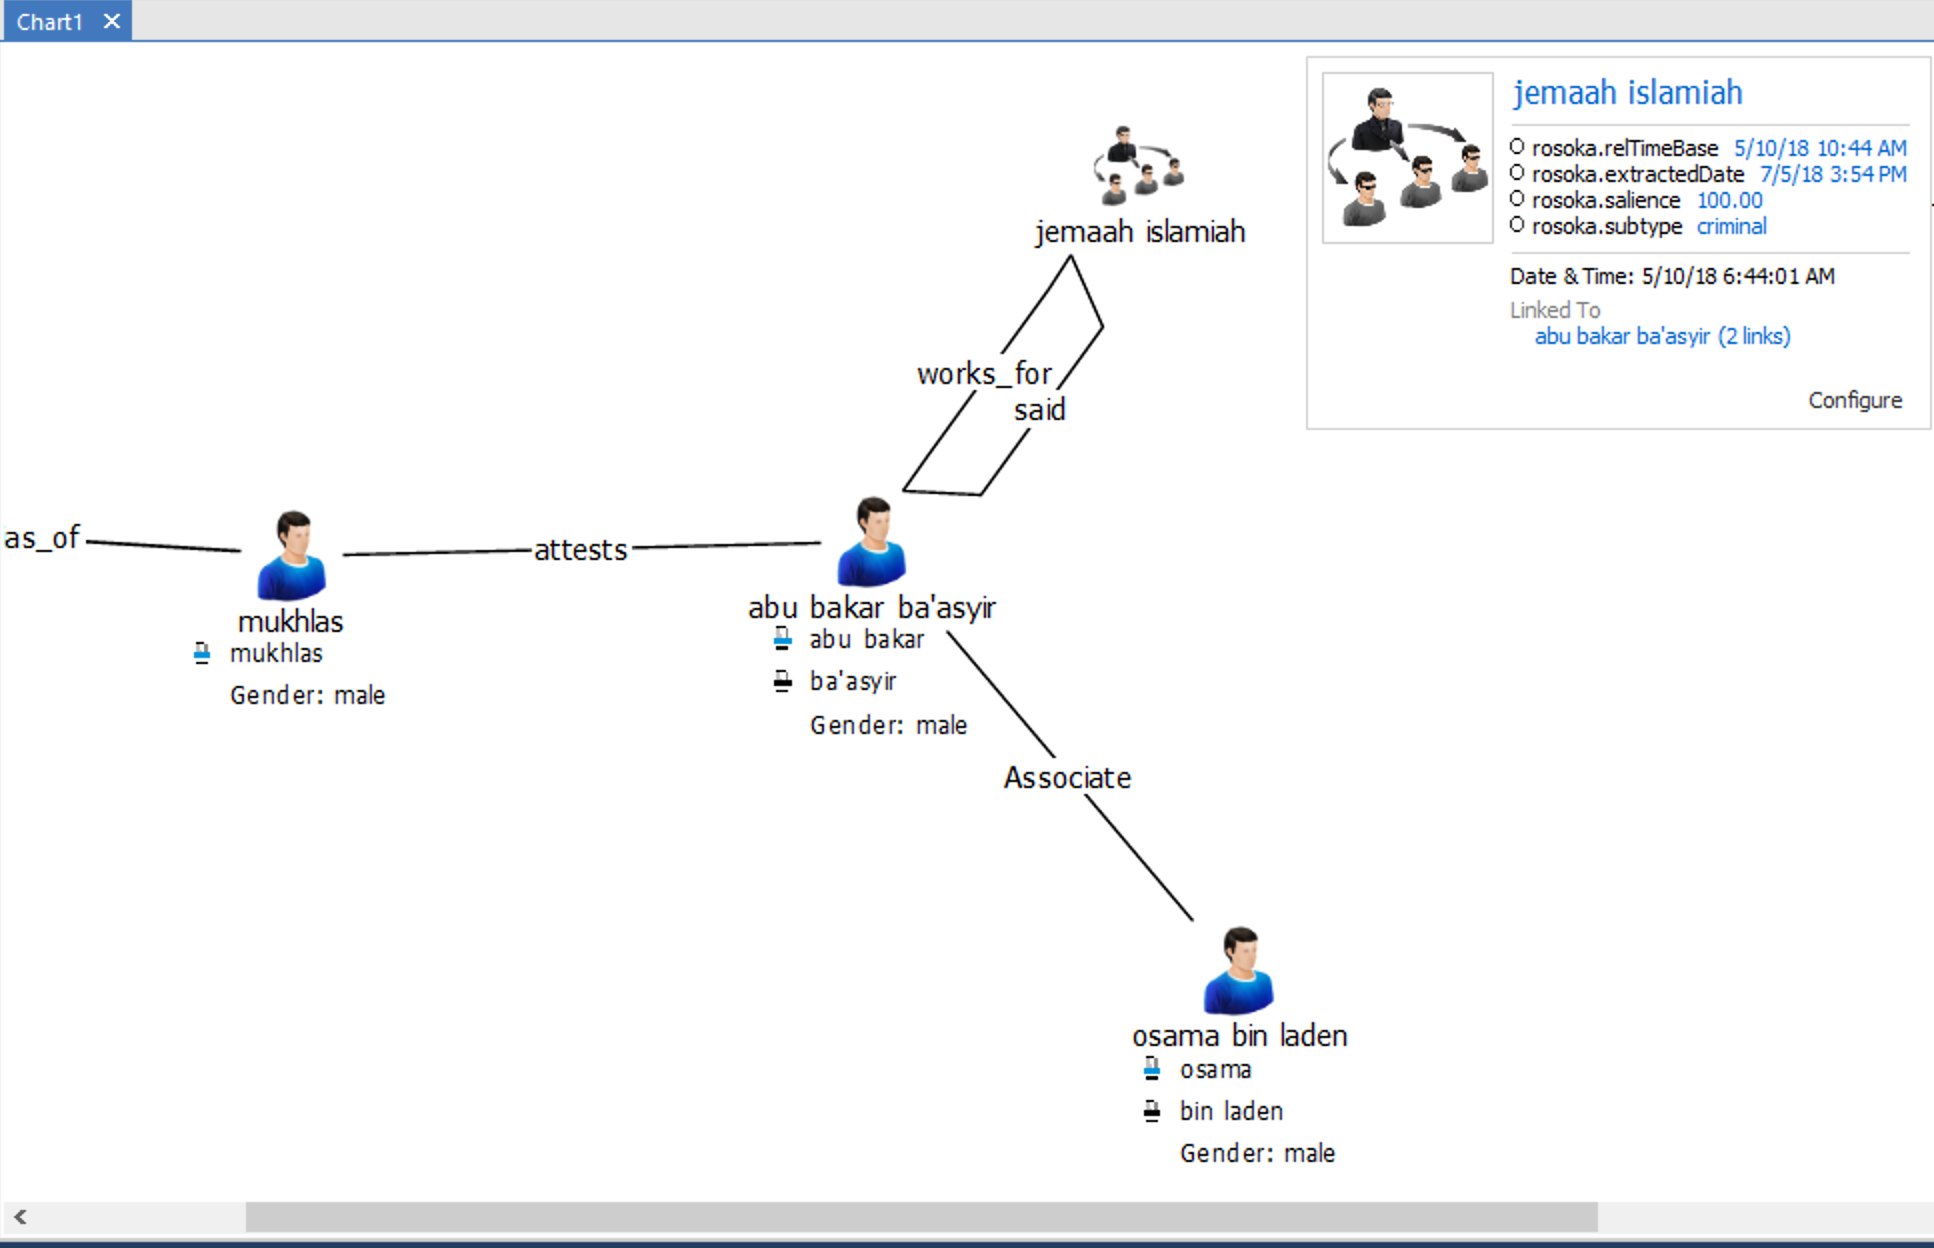
Viewing entities on the chart surface
You can hover over any entity on the Analyst's Notebook chart surface to display a window containing information about all the properties that are associated with that entity.
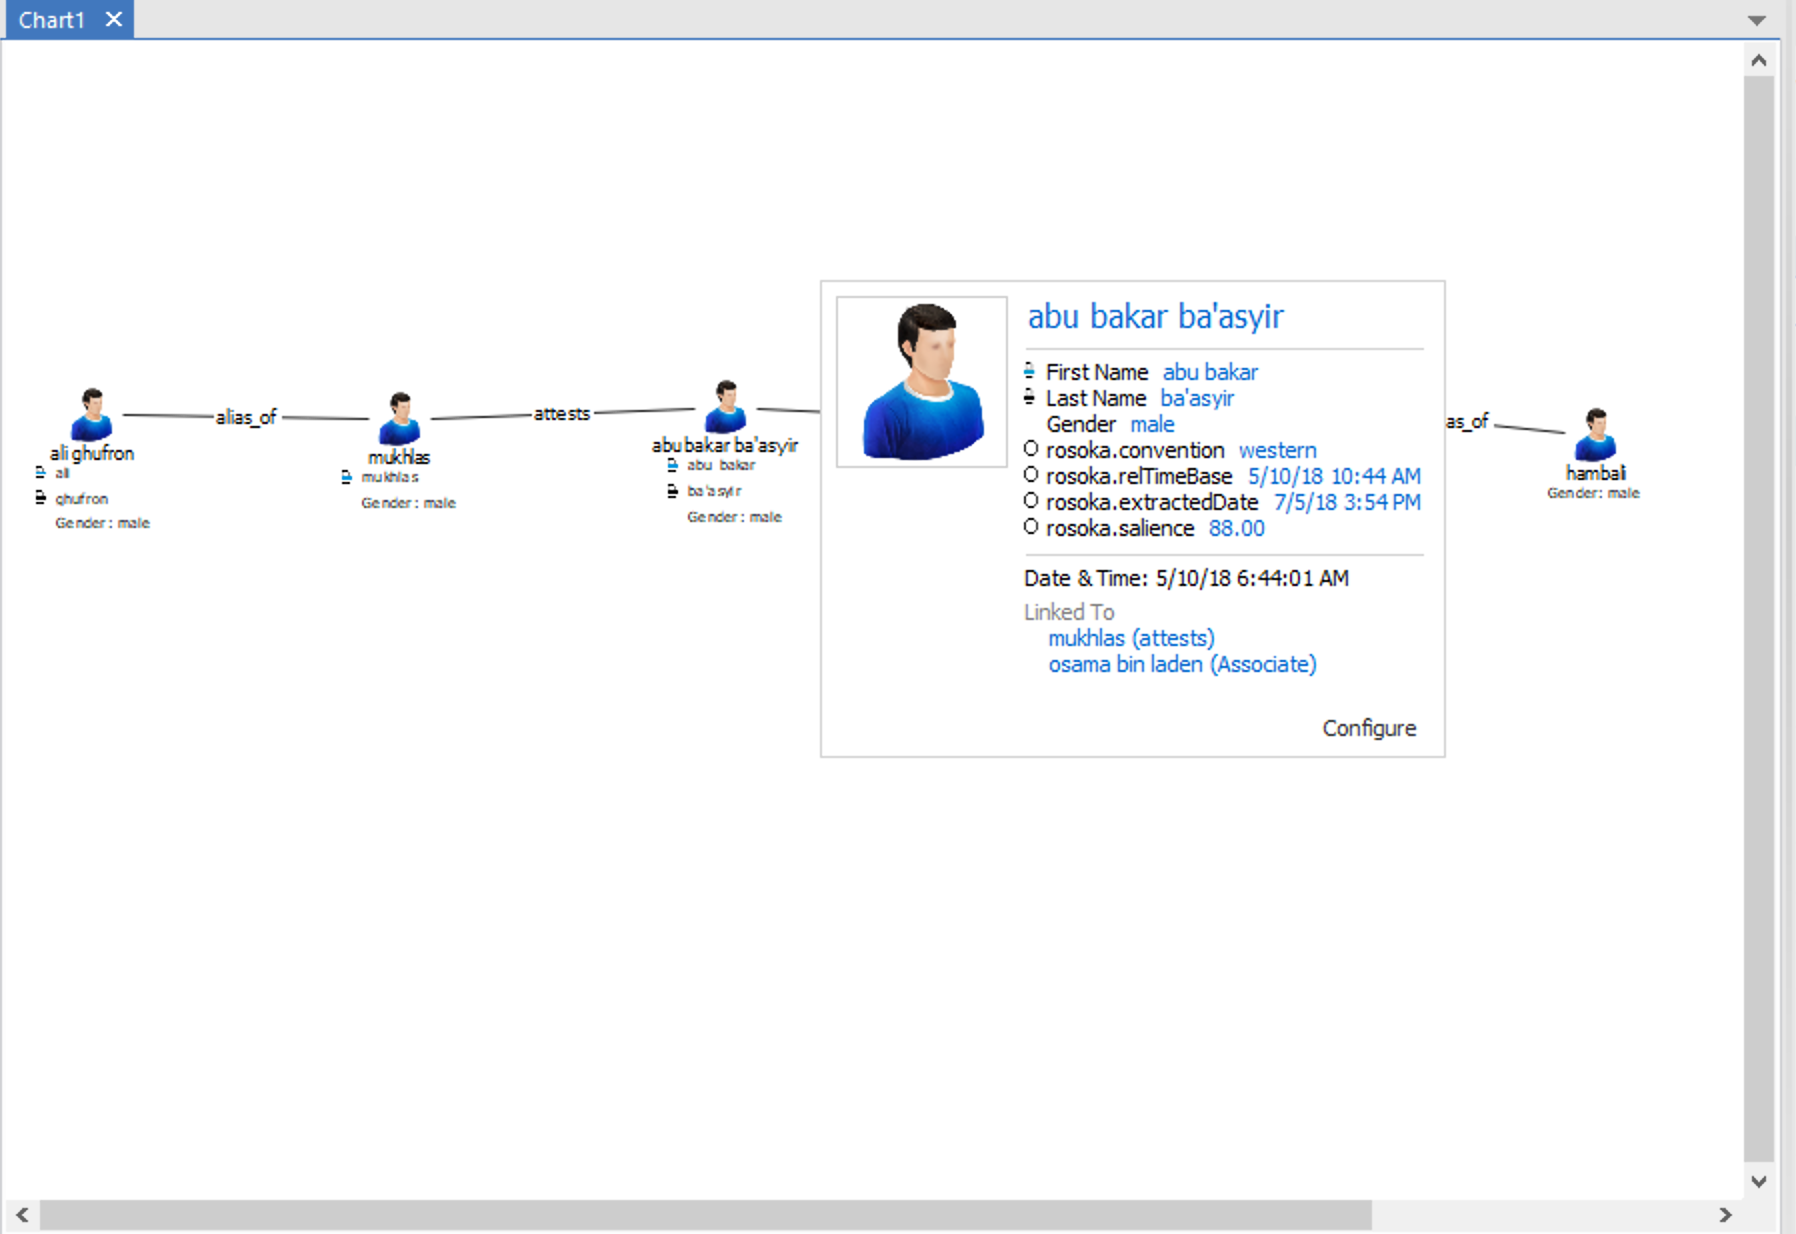
After you've added an entity from TextChart to the chart, you can use it to start adding related entities from the other documents that you've processed. Right-click the entity, and select Rosoka Expand.
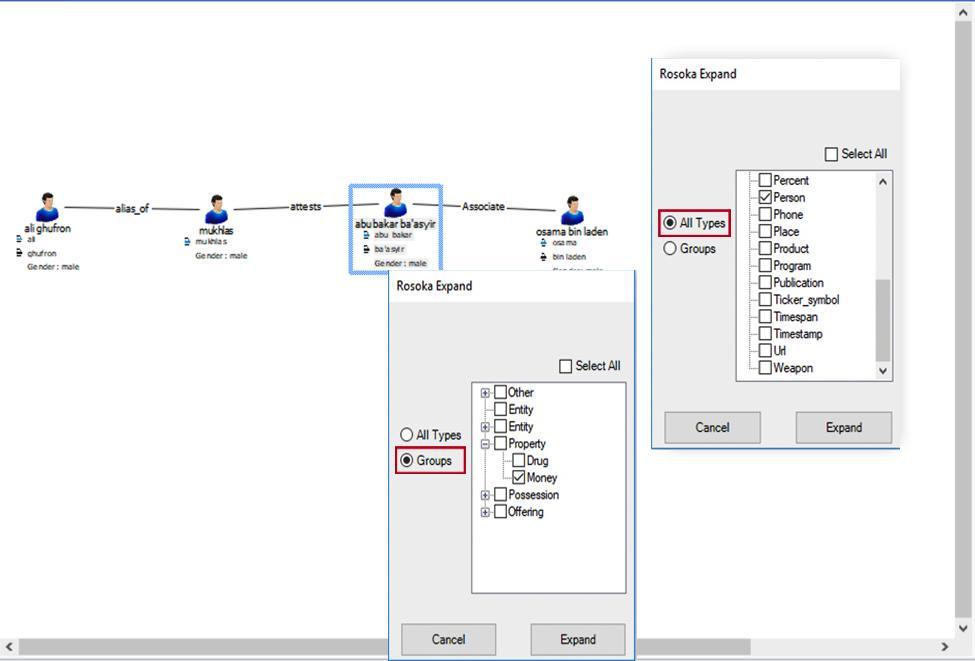
You can choose to add related entities of particular types, or groups of types; or you can use Select All to add all related entities in a single action.
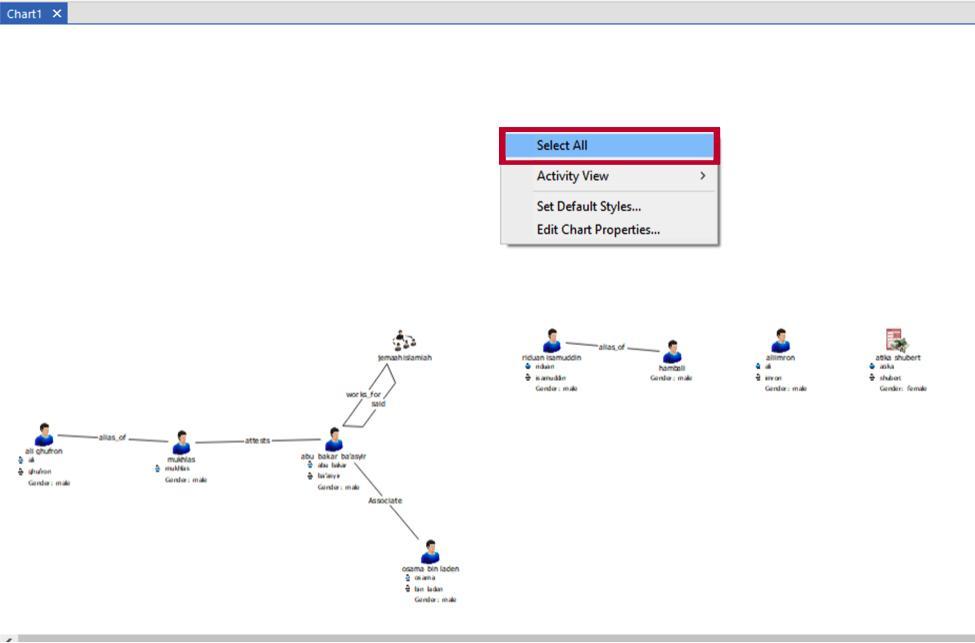
When a chart contains multiple TextChart entities, you can perform the same Rosoka Expand operation on all of them by right-clicking the chart surface and choosing Select All first.
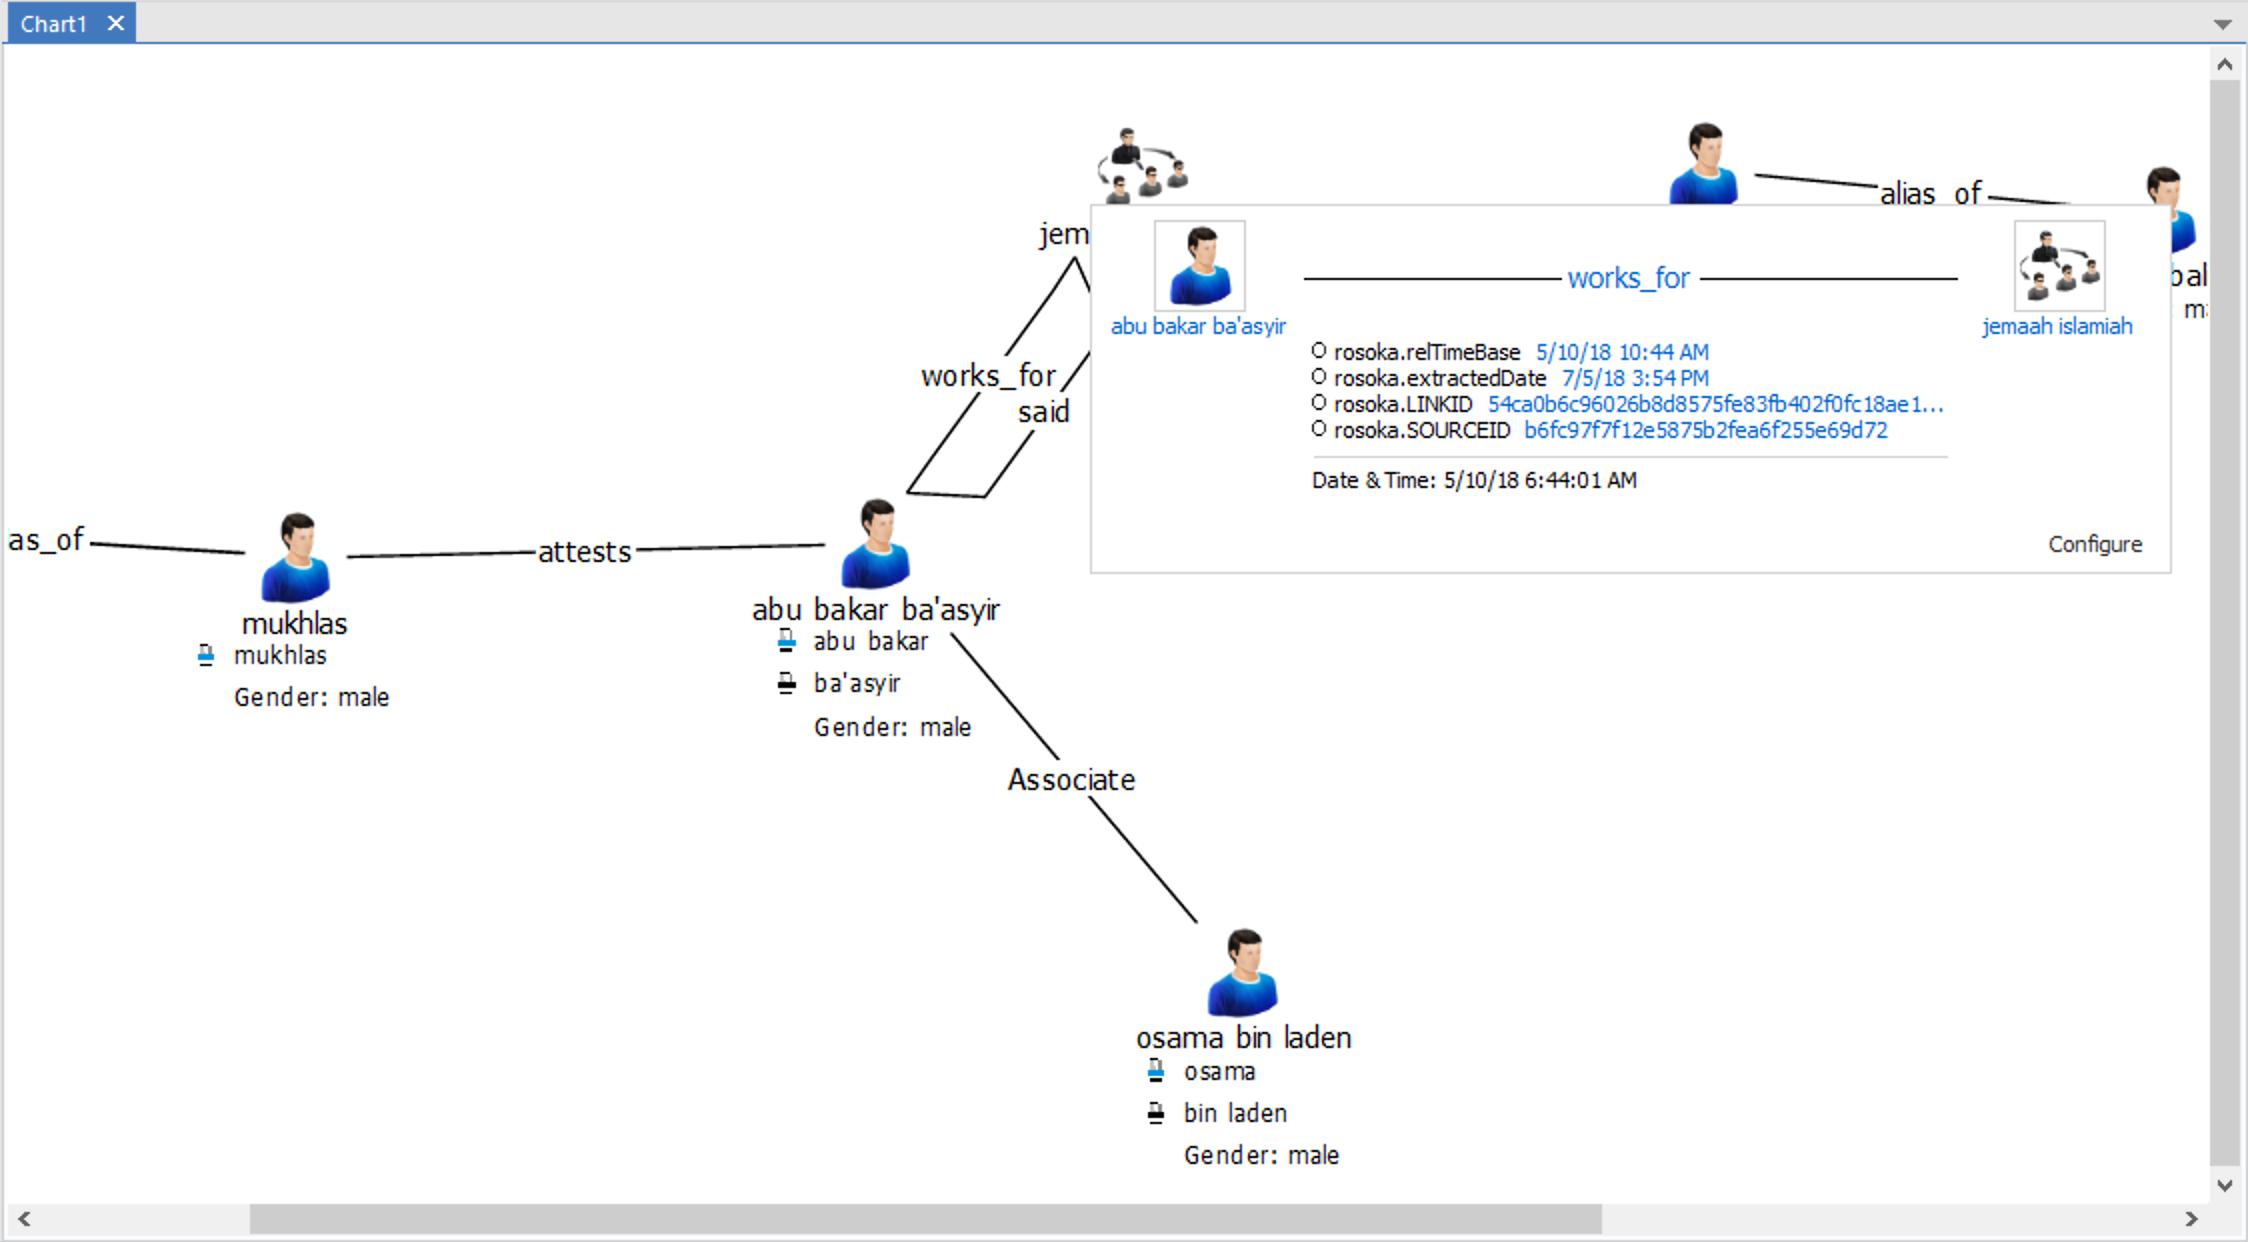
Viewing links on the chart surface
After you've added all the entities to the chart that you want to add, you can start to investigate the relationships between them, including the predicates that were responsible for the links being identified in the first place.
For example, hovering over a connected entity reveals a list of the entities that it is linked to, in addition to its properties.
Similarly, you can hover over a TextChart link to highlight the connection between two entities and display additional extraction information.
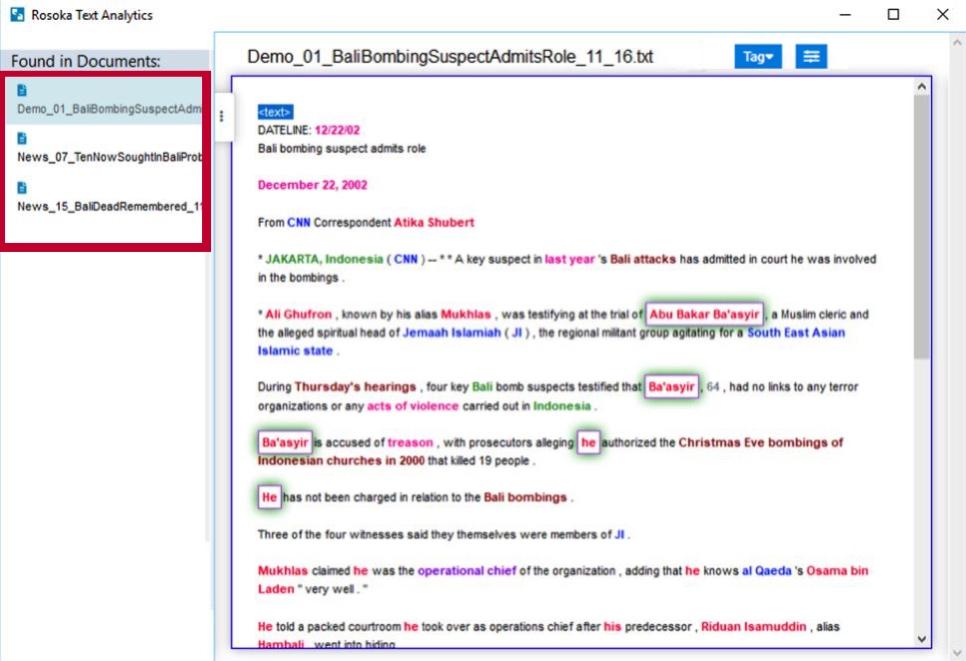
Listing source documents
For any entity or link that was added to the Analyst's Notebook chart surface through TextChart, you can quickly refer back to the documents from which it was extracted.
To retrieve all the documents for an entity or a link, right-click and select Show In Documents to reopen the Document View.
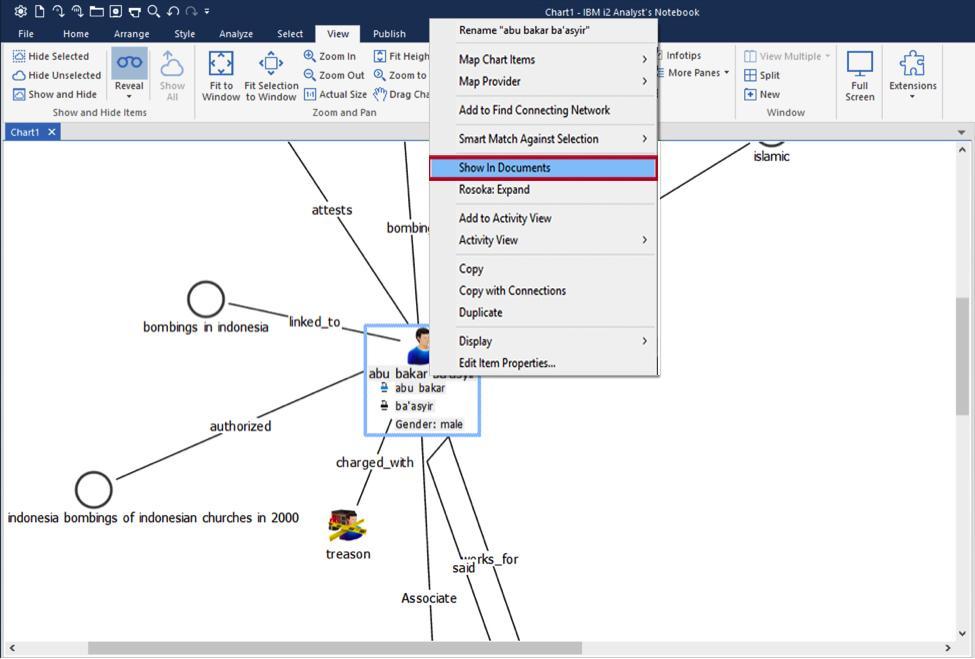
On the left of the view, the list of documents allows you to select which document appears on the right. Each document appears with text highlighting that reveals the entity or link in question.