TextChart Security
TextChart Premium comes with a built-in security option that utilizes i2 Analyze to protect information provided to it. This security option is a deny-by-default token-based authentication system.
Prerequisites:
Either a PostgreSQL or Microsoft SQL Server database that already has the base TextChart tables created.
SQL scripts containing the security schema.
Valid Licensing for i2 products.
i2 Analyze set up with security enabled.
Step-By-Step Setup Instructions
Run the SQL security scripts in your PostgreSQL or Microsoft SQL Server database.
Open Rosoka Data Access in a browser and navigate to the Database tab. Press on the Use i2 Analyze Security Schema? button and type in SECURITY and press Confirm.

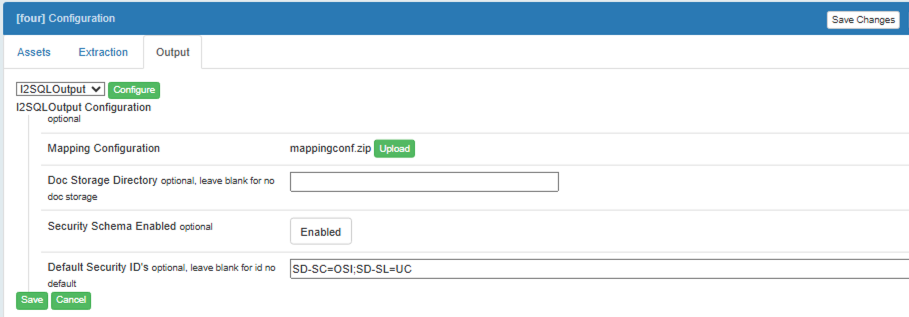
Open Extraction Manager in a browser and navigate to the Clusters tab. Then, click on the gear next to the cluster you want to enable security on and choose Configure. Select the Output tab and then press the Configure button. Scroll down to Security Schema Enabled and press on the button next to it. Type SECURITY and press confirm. Press the Save and then Save Changes button.

Restart TextChart Premium, Rosoka Data Access, Extraction Manager, and Extraction Worker.
To verify TextChart Security is functioning, go to the TextChart ribbon, press on it, and look for the Security option.
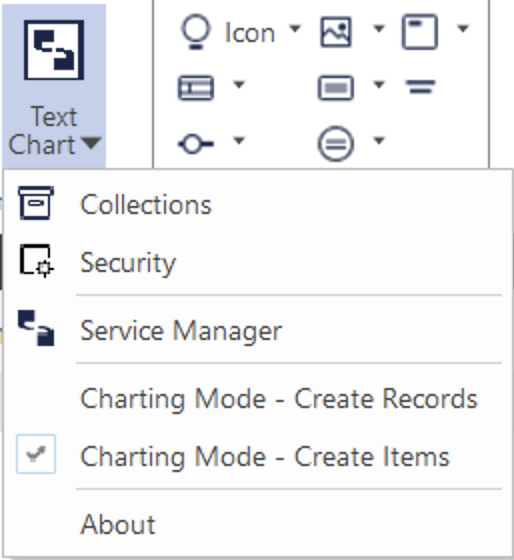
If that option is visible, then security has been successfully enabled. Additionally, if a user tries to process a document with security enabled, a security pop-up will appear.
Usage:
Security is added to individual documents. There is no security on a document until it is processed. The security of a collection depends on the security of the documents within it. If a user does not have access to any of the documents within the collection, the collection will not be visible. If a user does not have access to the document, the user will not be able to open the document viewer.
Once logged in, users can modify security settings by selecting the Security option in the TextChart ribbon. The contents of the pop-up that appears will depend on settings in i2 Analyze.
When processing documents, a pop-up will appear allowing a user to choose what security the document will have. This pop-up may appear behind i2 Analyst's Notebook.
If a user does not process the documents within a collection before navigating away from that collection, then that collection will not be visible afterward. This will prevent a user from creating a collection of the same name. In order to create a collection with the same name, the user will have to clear the local database, which can be done using the TextChart Configuration UI that comes with TextChart and is available in the TextChart installation folder. Be aware that clearing the local database will remove ALL collections, but will not delete any processed documents. Any processed documents can be readded to new collections.
The user can provide Default Security Ids in Extraction Manager by navigating to the Clusters tab, clicking on the gear next to the desired cluster, choosing Configure, selecting the Output tab, and pressing the Configure button. Scroll down to Default Security Ids. Type in the desired Default Security Ids and press confirm. Press Save and then Save Changes button. Here is an example Default Security Ids value: SD-SL=CON;SD-SC=HI. SD-SL is the Security Level and SD-SC is the Security Category. Multiple values are separated by semicolons.